| Permissions |
|
| Related readings |
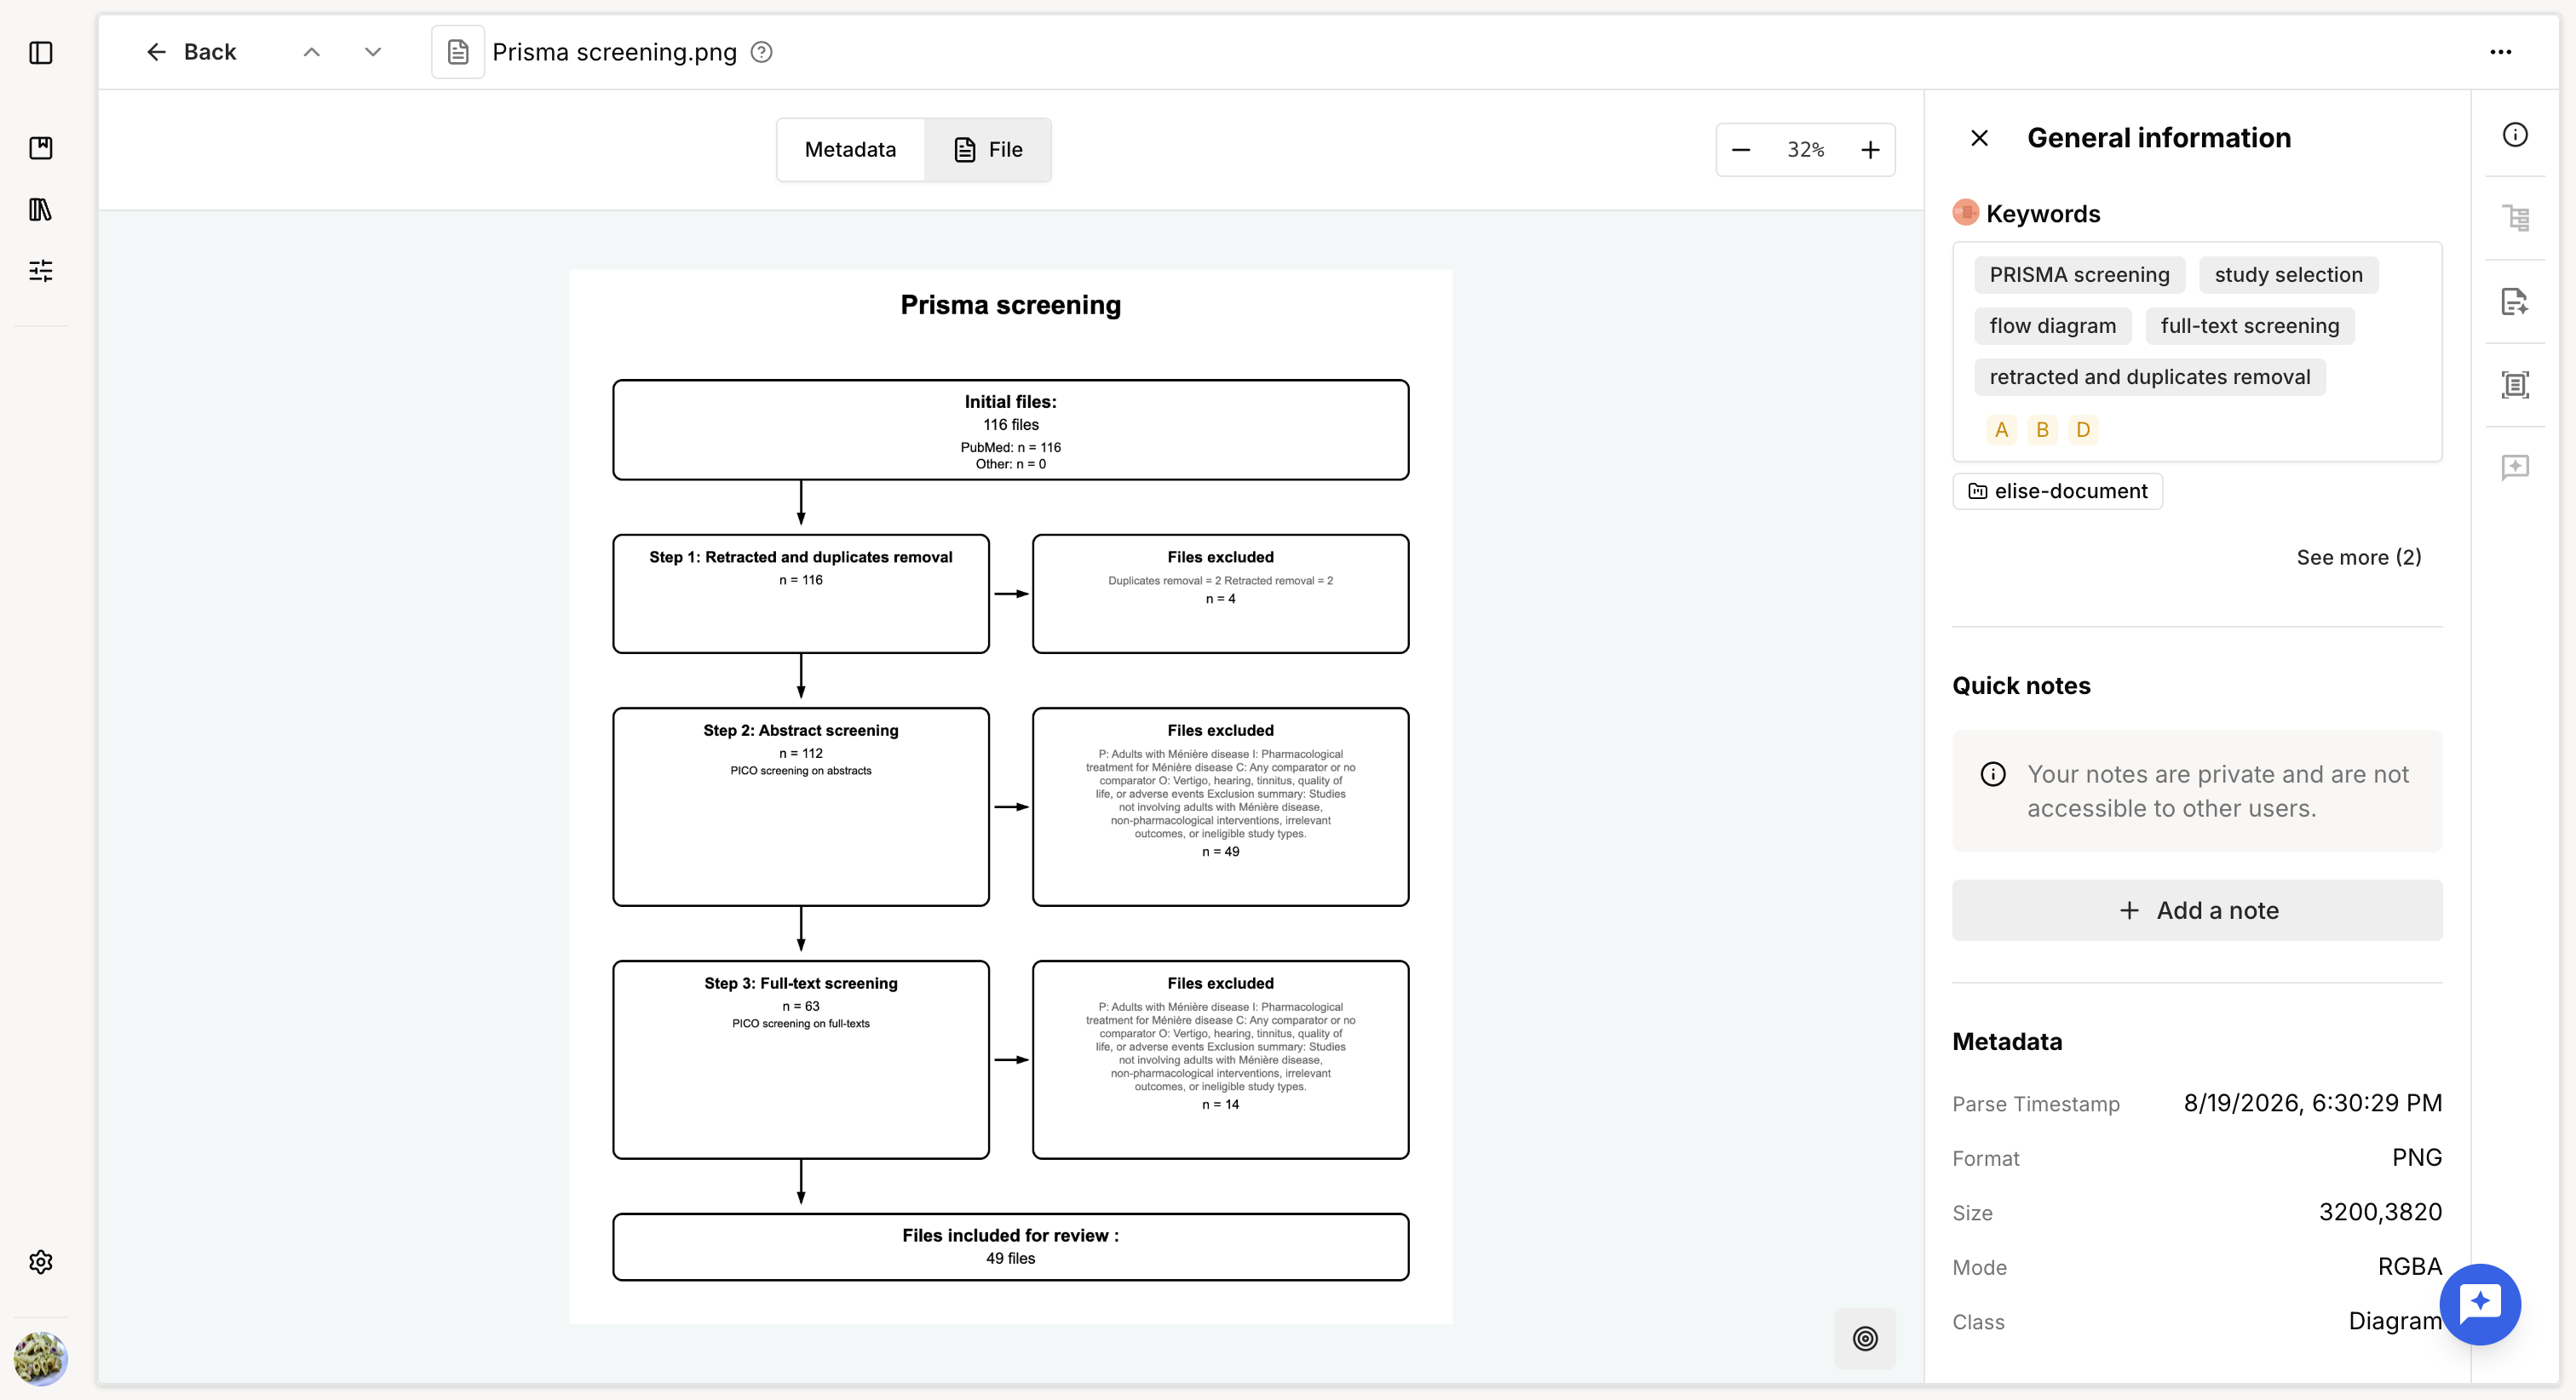
From a Knowledge table with active filters, you can generate a PRISMA flow diagram that represents the screening process performed through the successive filters applied to the table.
The diagram can be saved as a PNG file in a project or collection.
TABLE OF CONTENTS
View filtering details
Before generating the diagram, review the filters applied to the table.
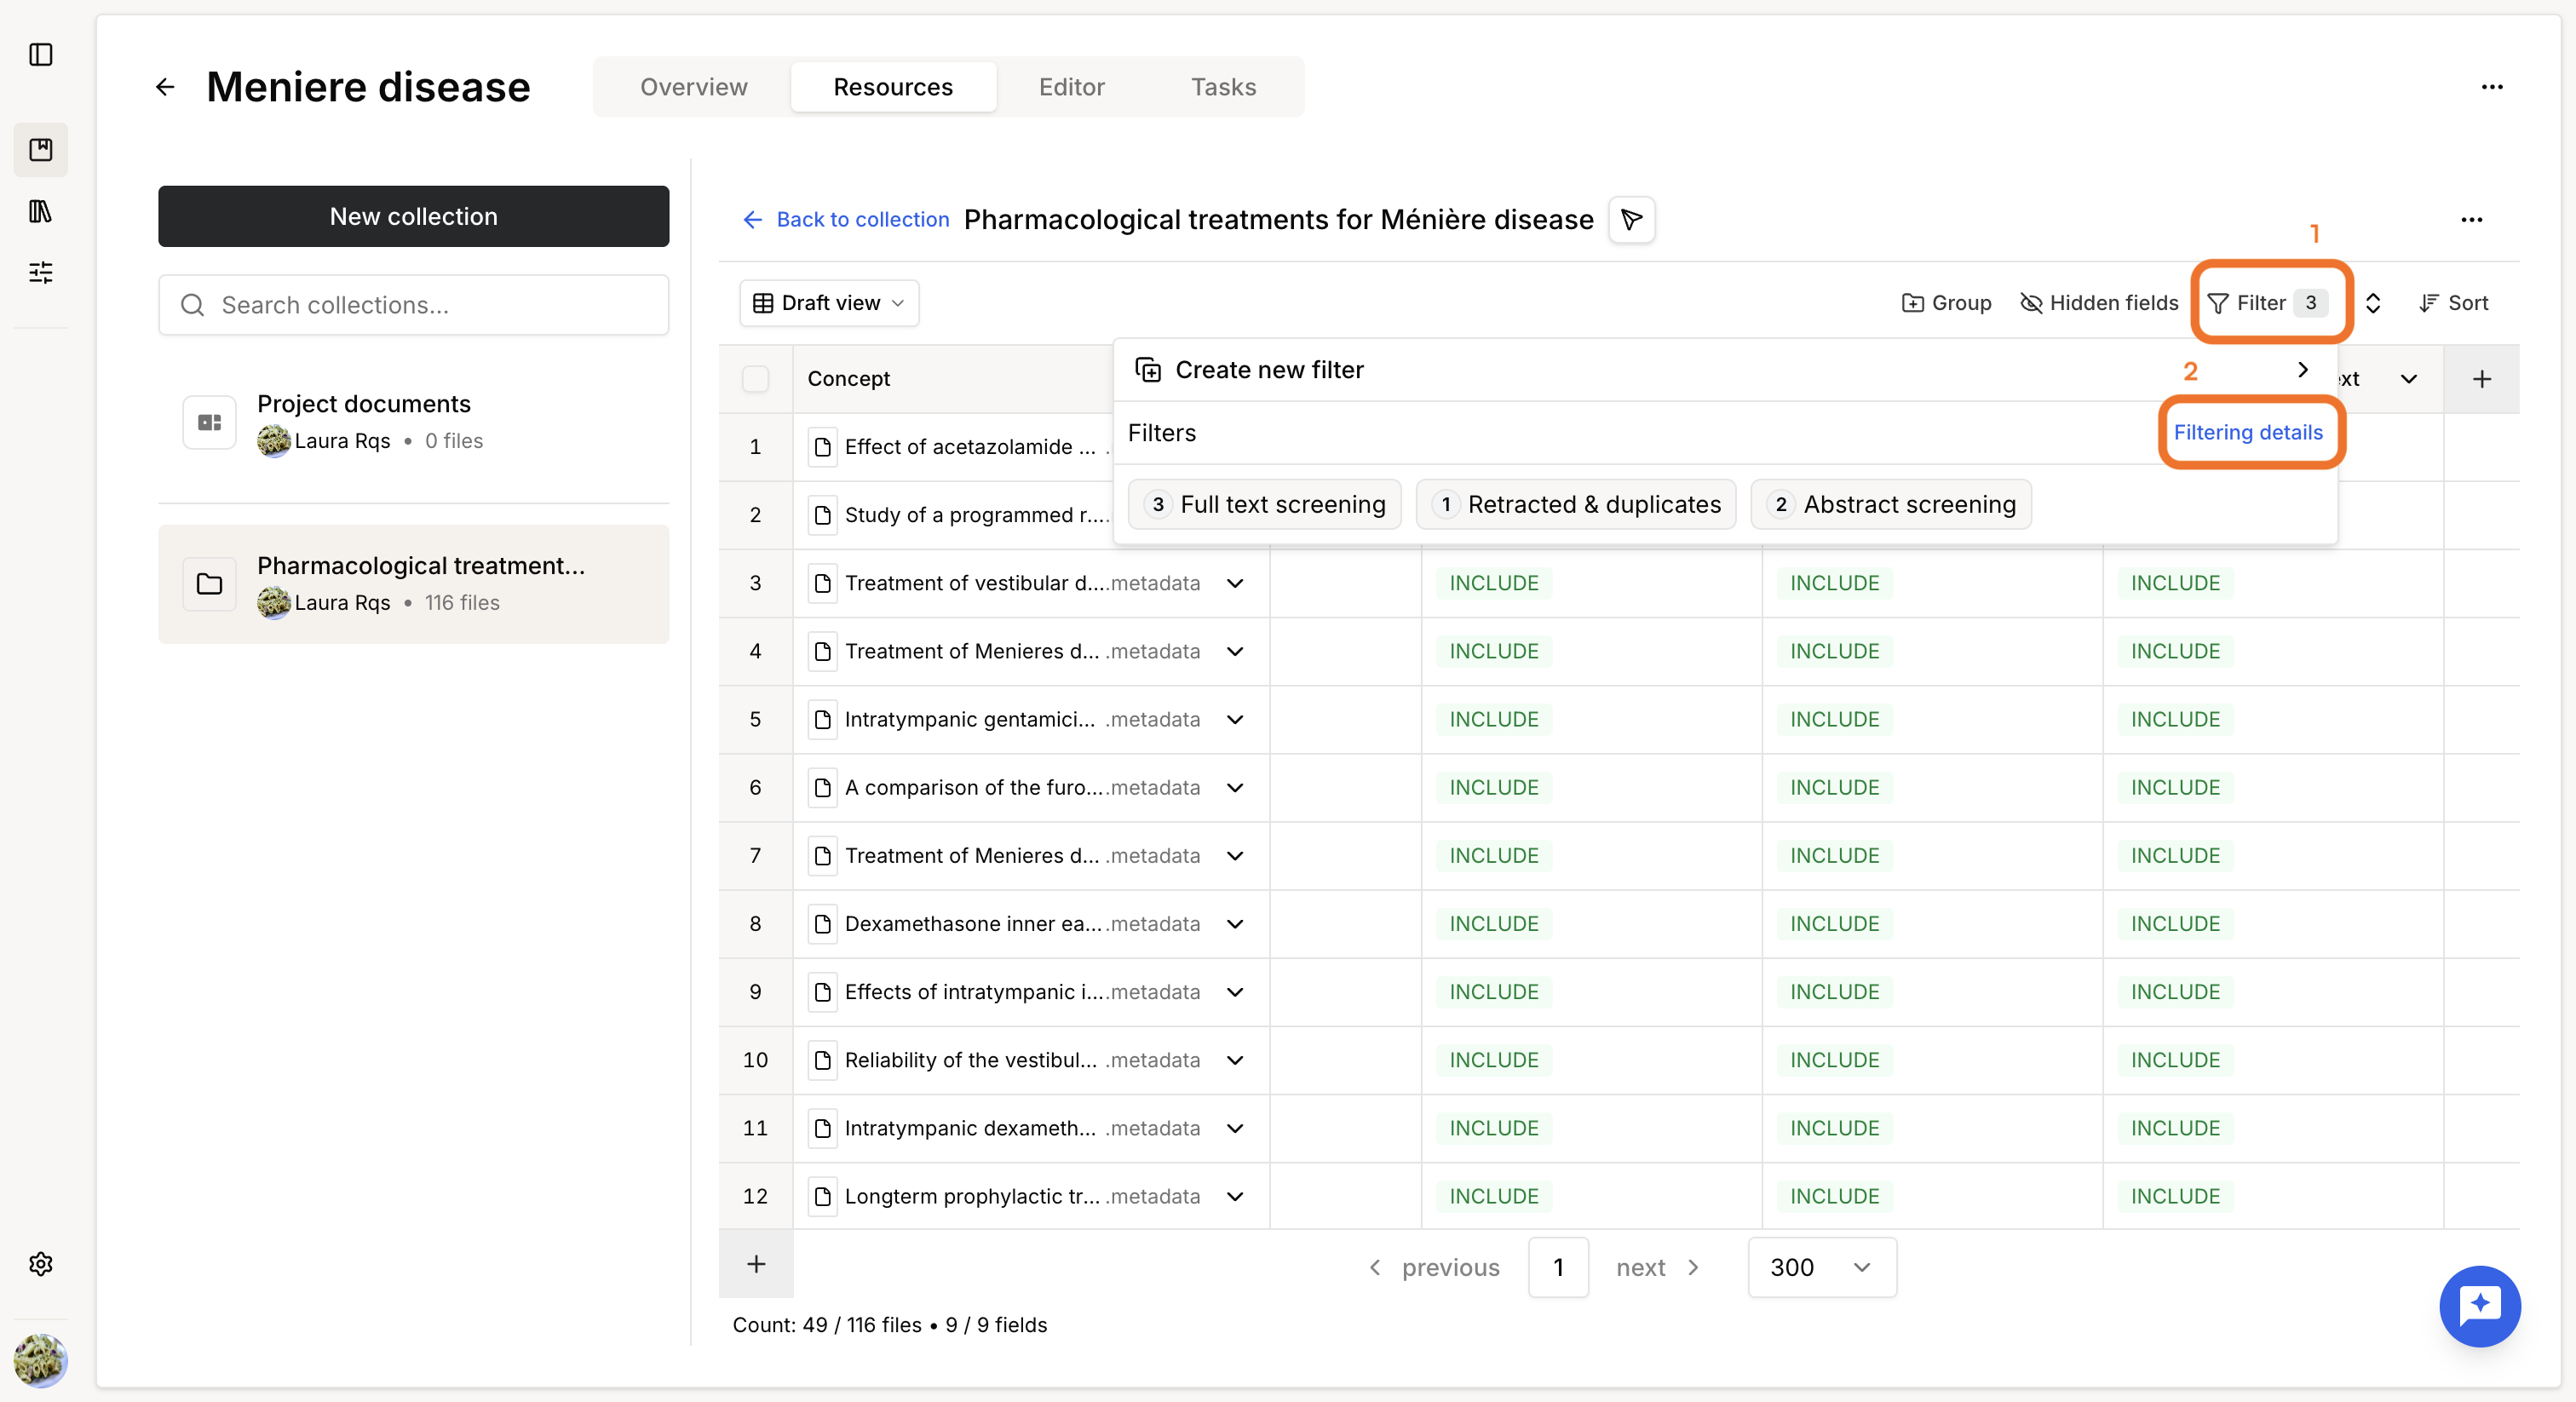
To access the filtering details:
- Click Filter.
- Select Filtering details.
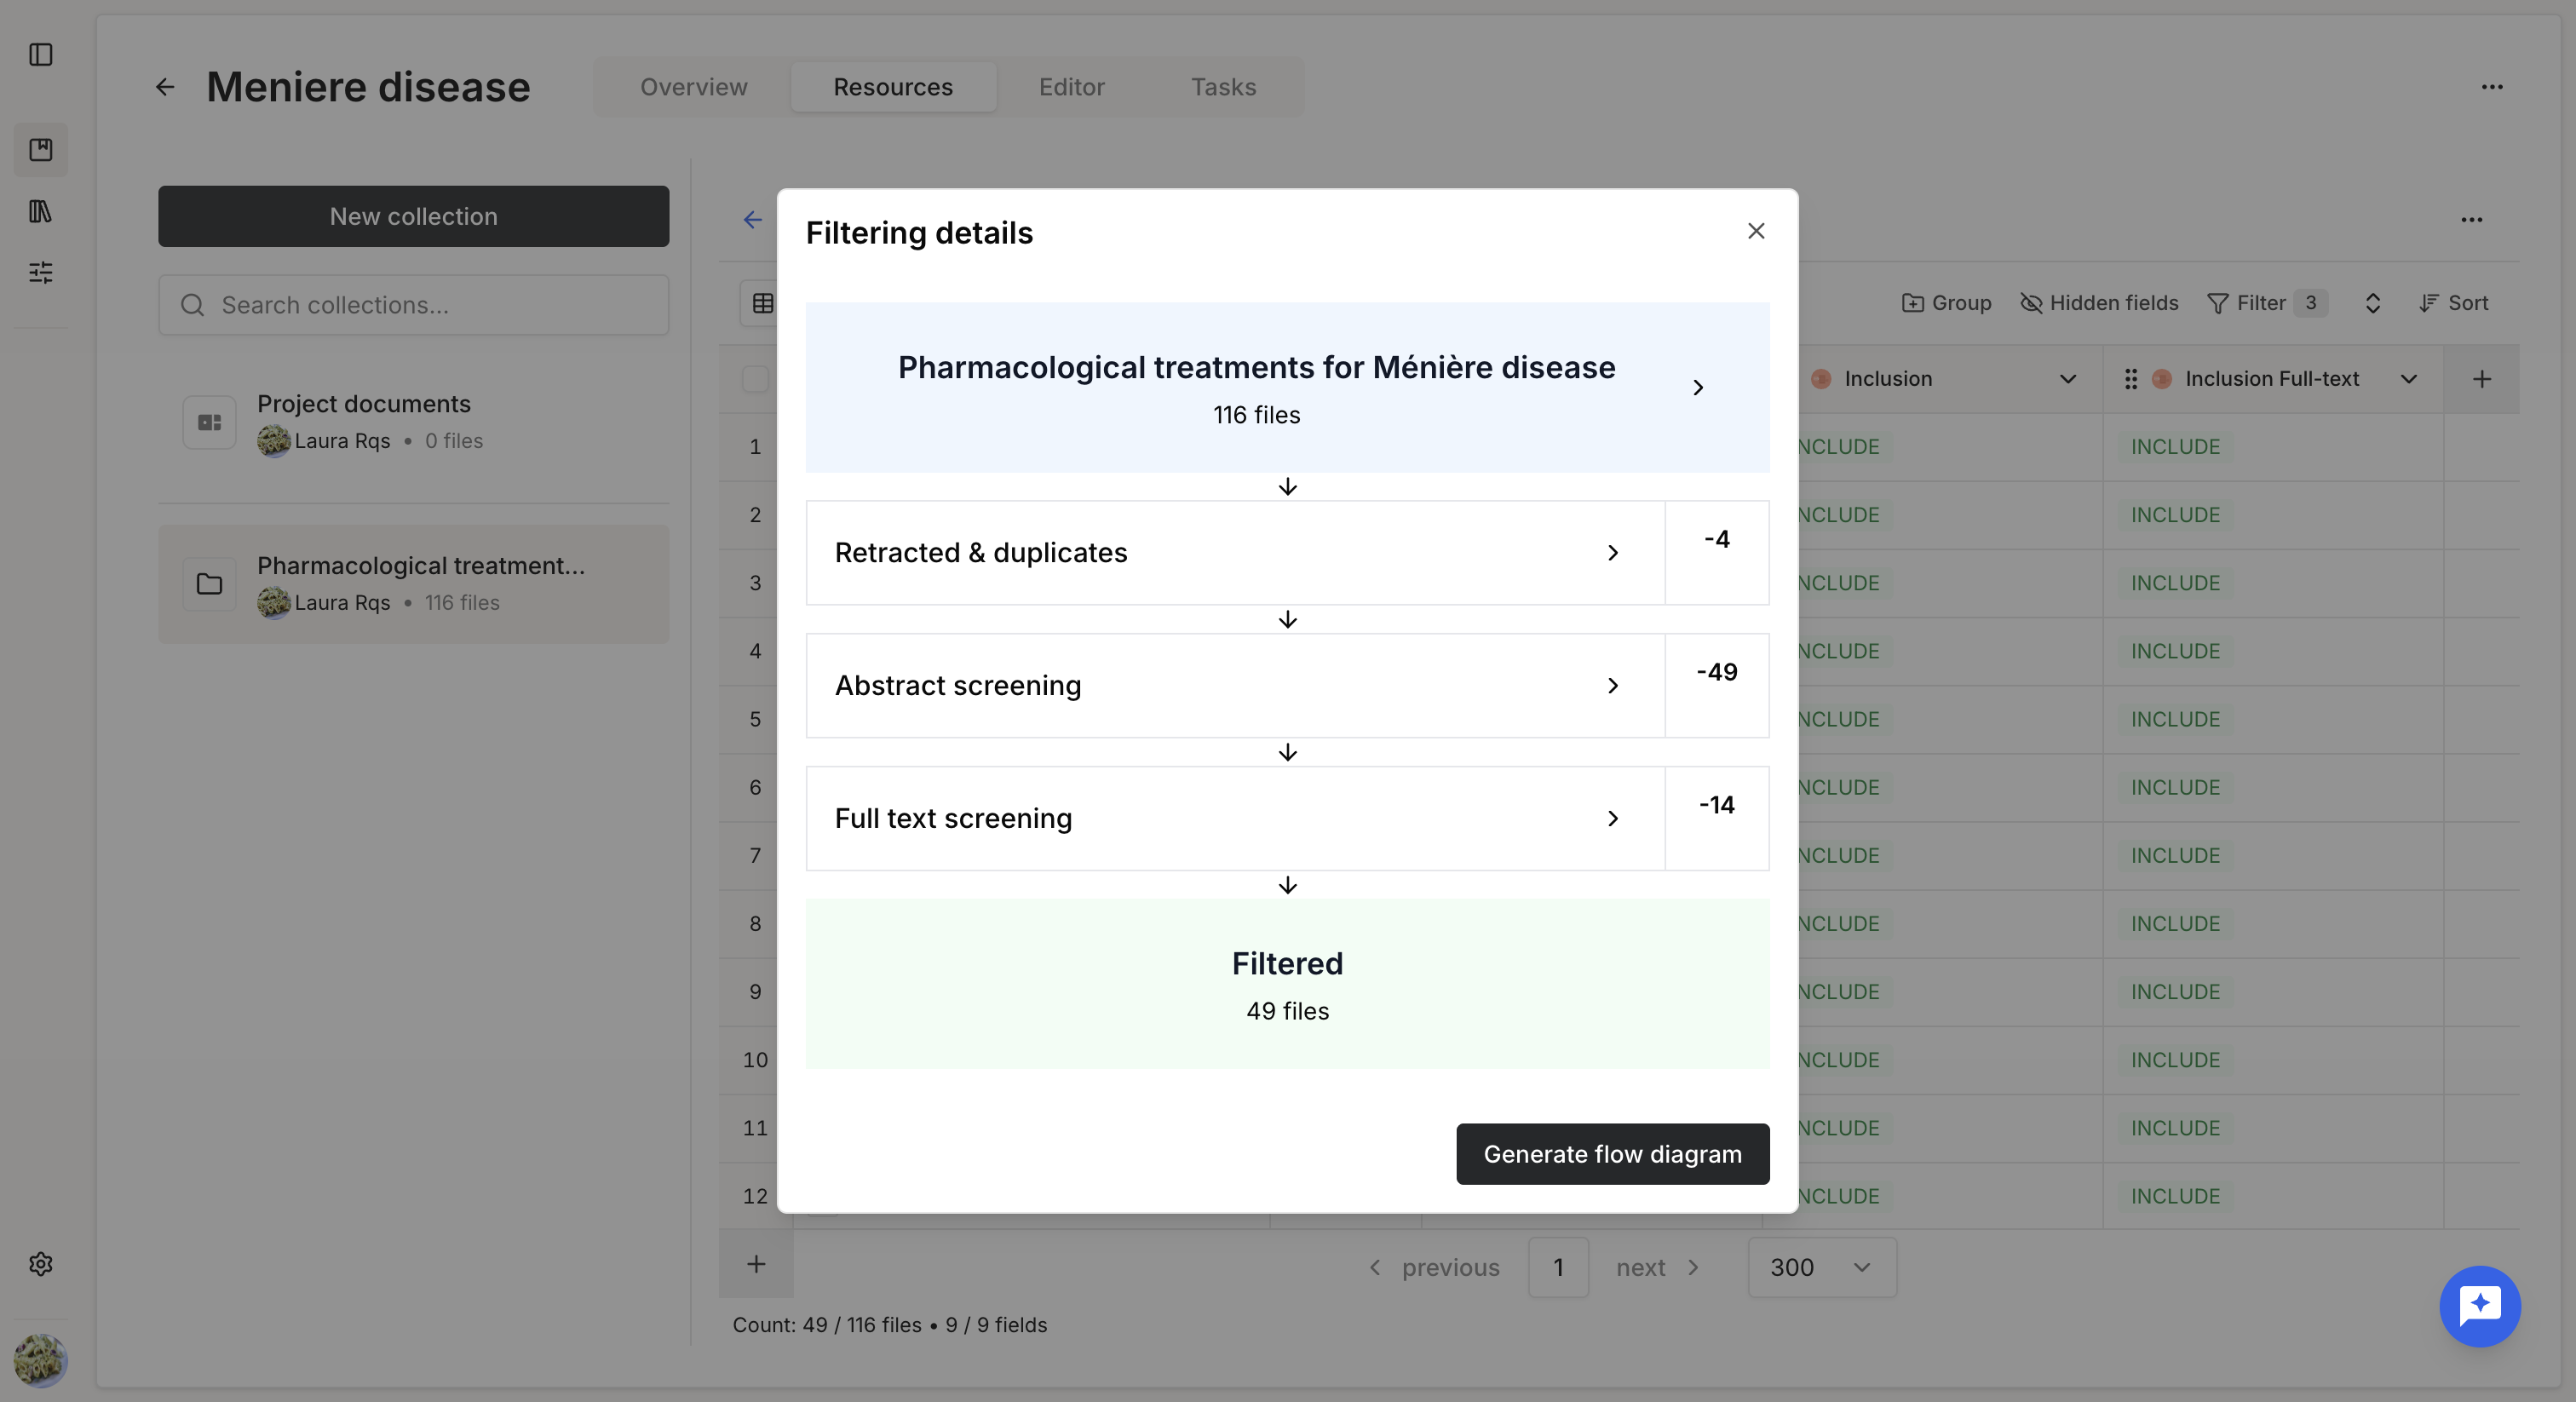
A modal displays the current screening process, including:
- The different views, if the table is based on parent collections.
- The filters applied to each view.
- The number of files excluded by each filter.
Configure the PRISMA diagram
From the Filtering details modal, click Generate flow diagram.
You can then configure the diagram by:
- Naming the diagram (optional).
- Renaming the Initial and Final steps (optional).
- Selecting the views to include in the diagram.
- Adding stepsto each selected view. For each step, you can:
- Enter a name.
- Add a description, displayed on the left side of the diagram.
- Add a comment about excluded files, displayed on the right side of the diagram.
- Add at least one filter.
You can also enable the following options:
- Display database breakdown: displays the number of files from each database, when this information is available in the file metadata.
- Display filter details on diagram: displays the filter conditions used at each step in the diagram.
Once the configuration is complete, click Preview to review the diagram.
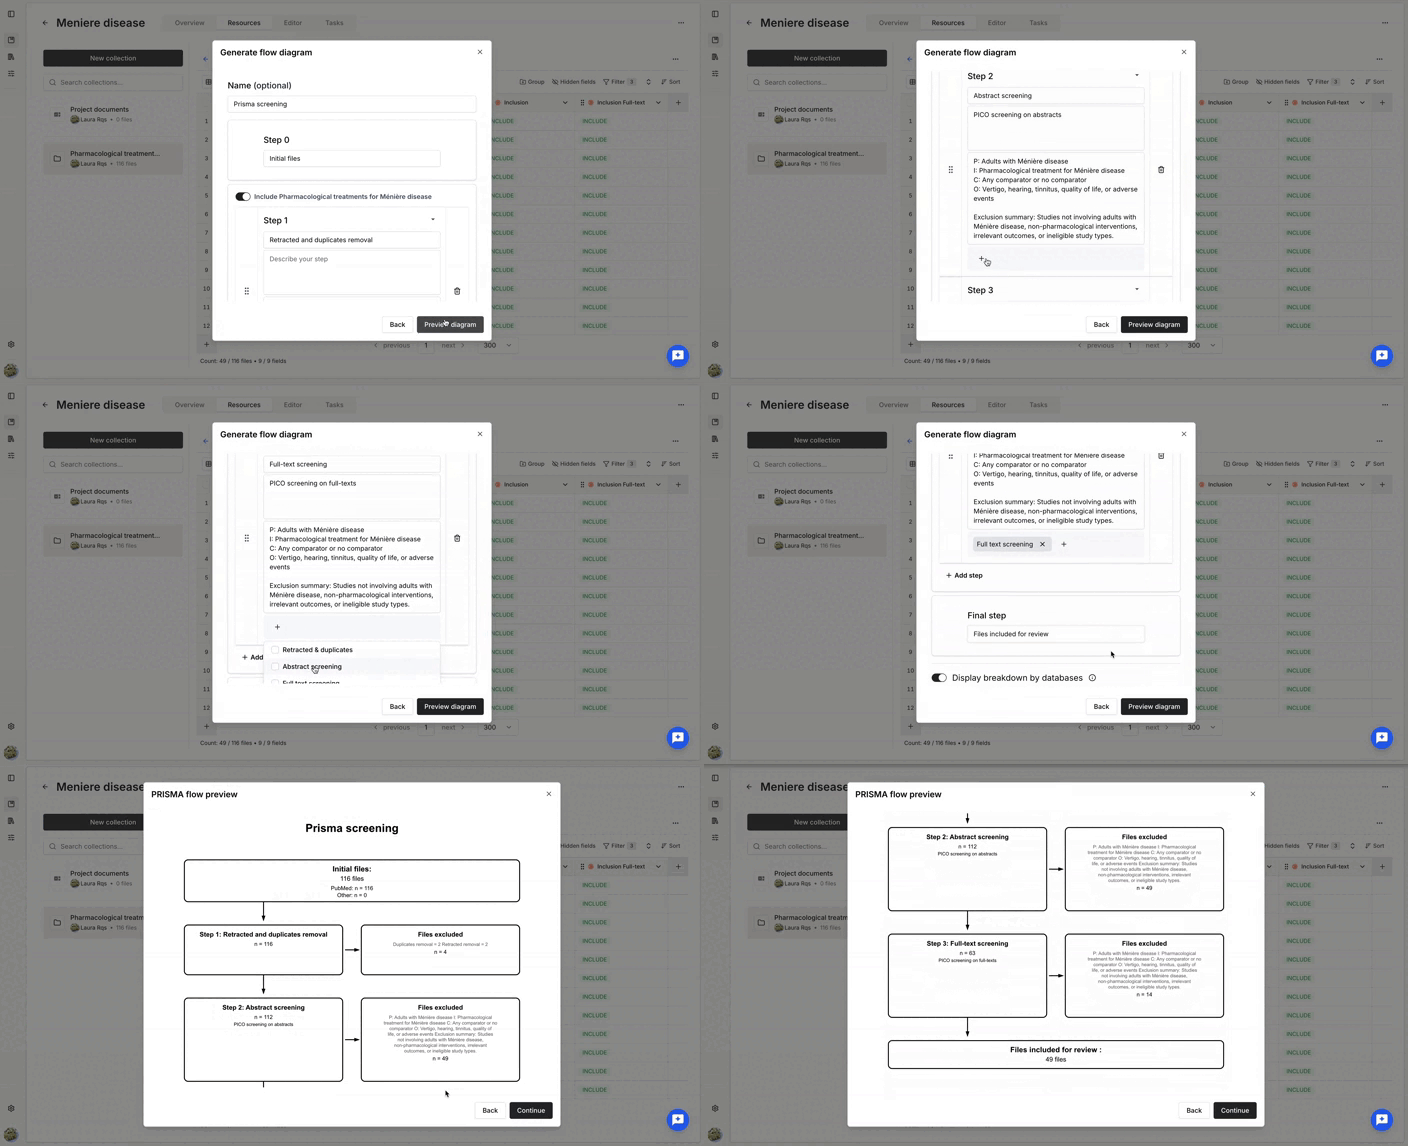
If you need to make changes, click Back to return to the configuration.
If the diagram is ready, click Continue.
Save the PRISMA diagram
The final step is to select where to save the diagram.
You can save it in:
- The project documents.
- A collection, except the collection used to generate the diagram.
If needed, you can create a new collection directly from this step. The new collection is automatically added to the project.
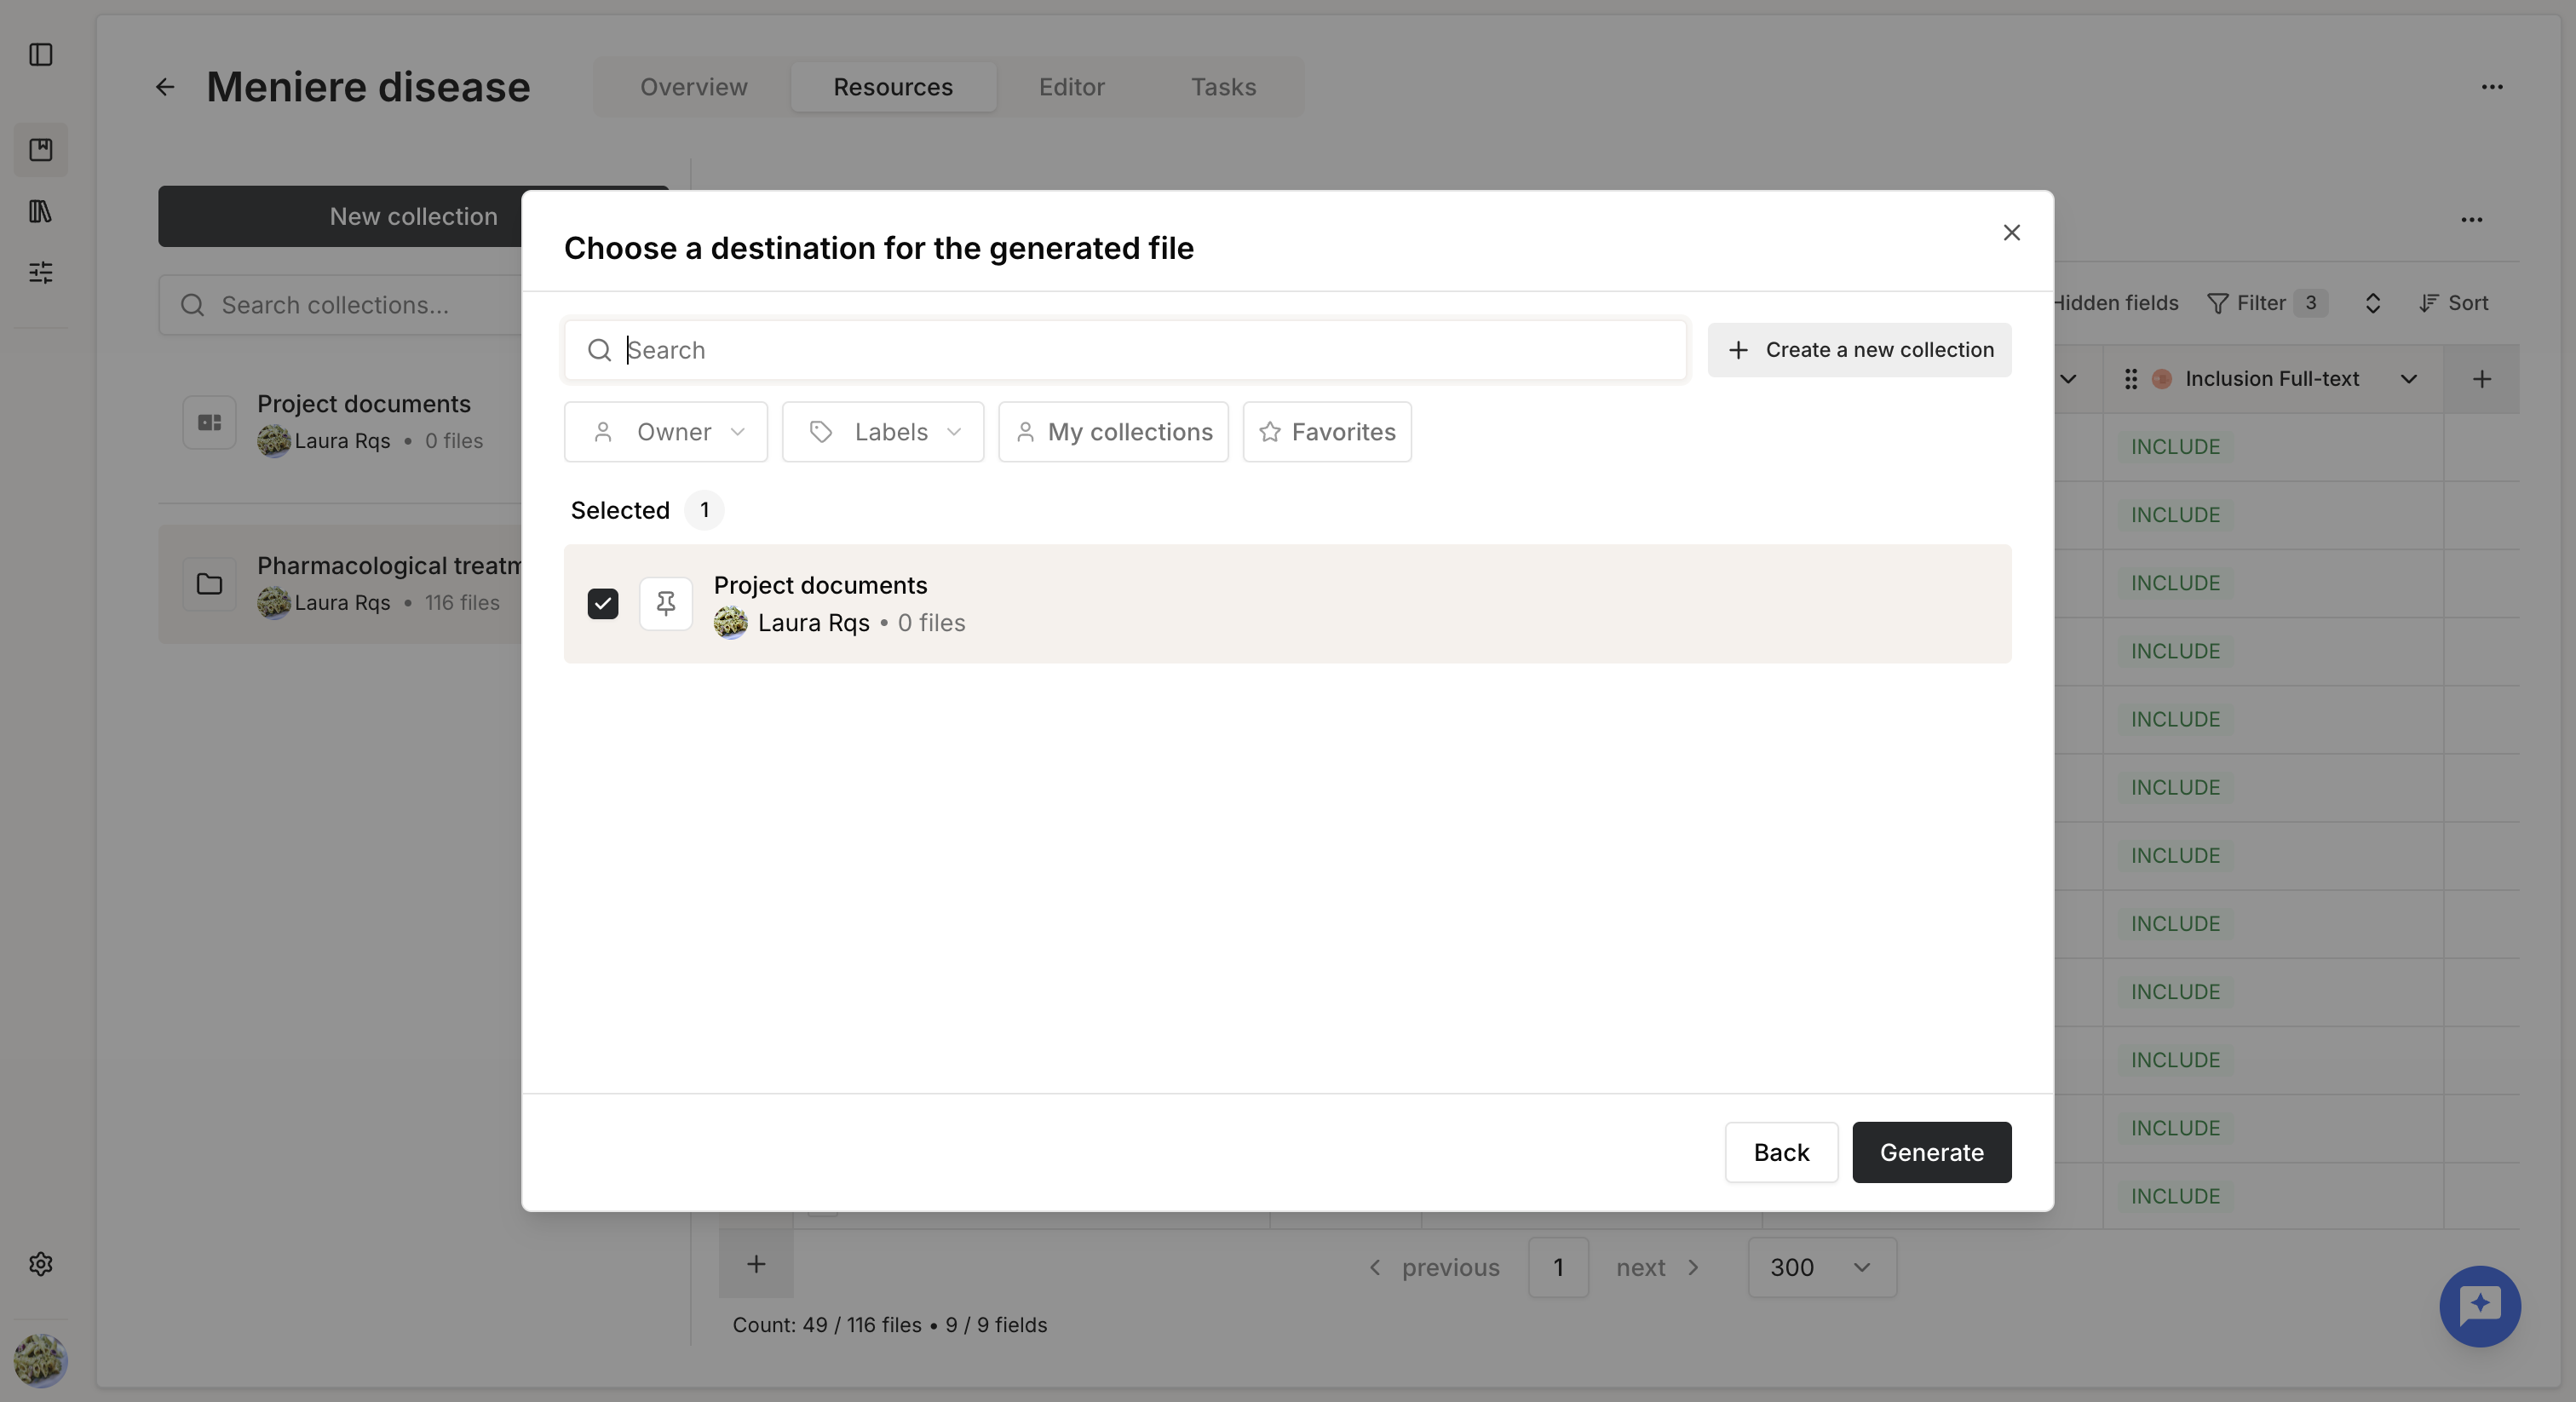
Select the destination and click Generate.
The diagram is saved as a PNG file in the selected destination.
Like any other file on the platform, the diagram can be downloaded or reused as a source.
For example, you can use it as a source in the Editor or copy and paste it directly into an Editable document.
Was this article helpful?
That’s Great!
Thank you for your feedback
Sorry! We couldn't be helpful
Thank you for your feedback
Feedback sent
We appreciate your effort and will try to fix the article