| Permissions |
|
| Related readings |
Workspaces allow to separate users and data within an organization.
An organization can have one or several workspaces.
TABLE OF CONTENTS
Create a workspace
Only organization admins can create a workspace.
N.B. A workspace cannot be deleted. Make sure you create a workspace only when needed.
To create a workspace:
1. Go to the Workspaces tab in the Admin Portal.
2. Click +New.
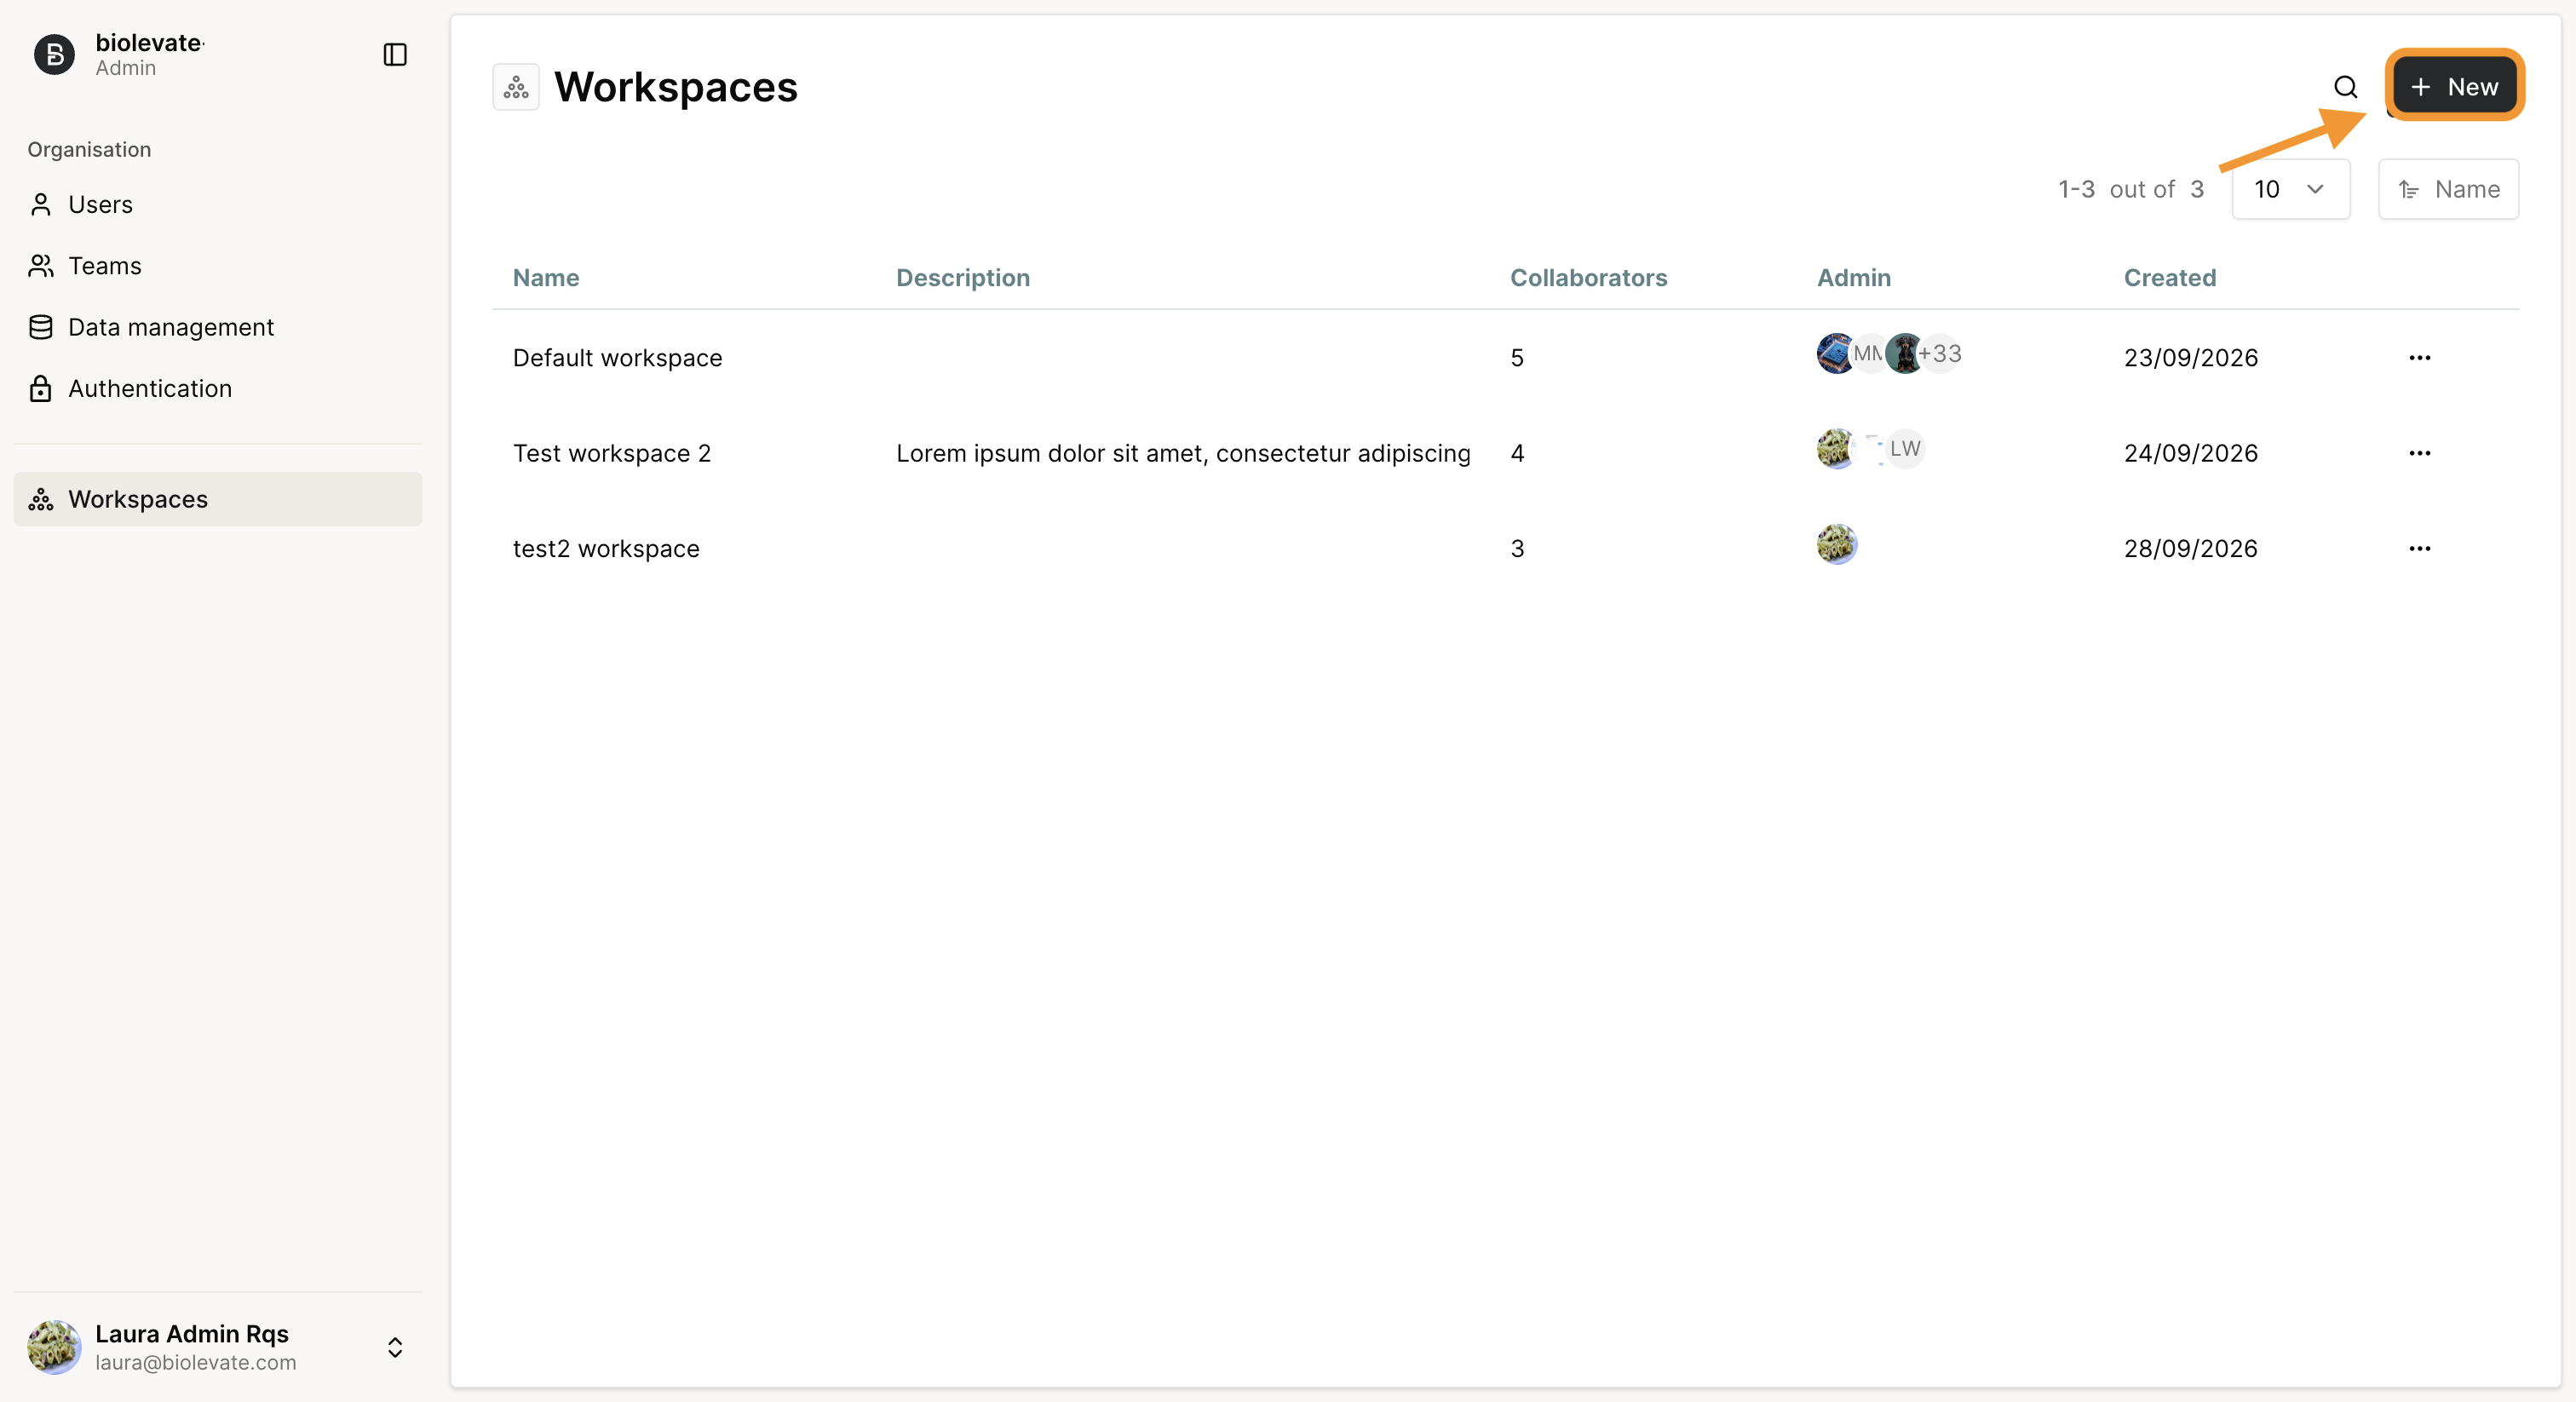
3. Complete the form with the required information:
- Name
- Description (optional)
- Users or Teams (optional): add a user or team and assign each user a role
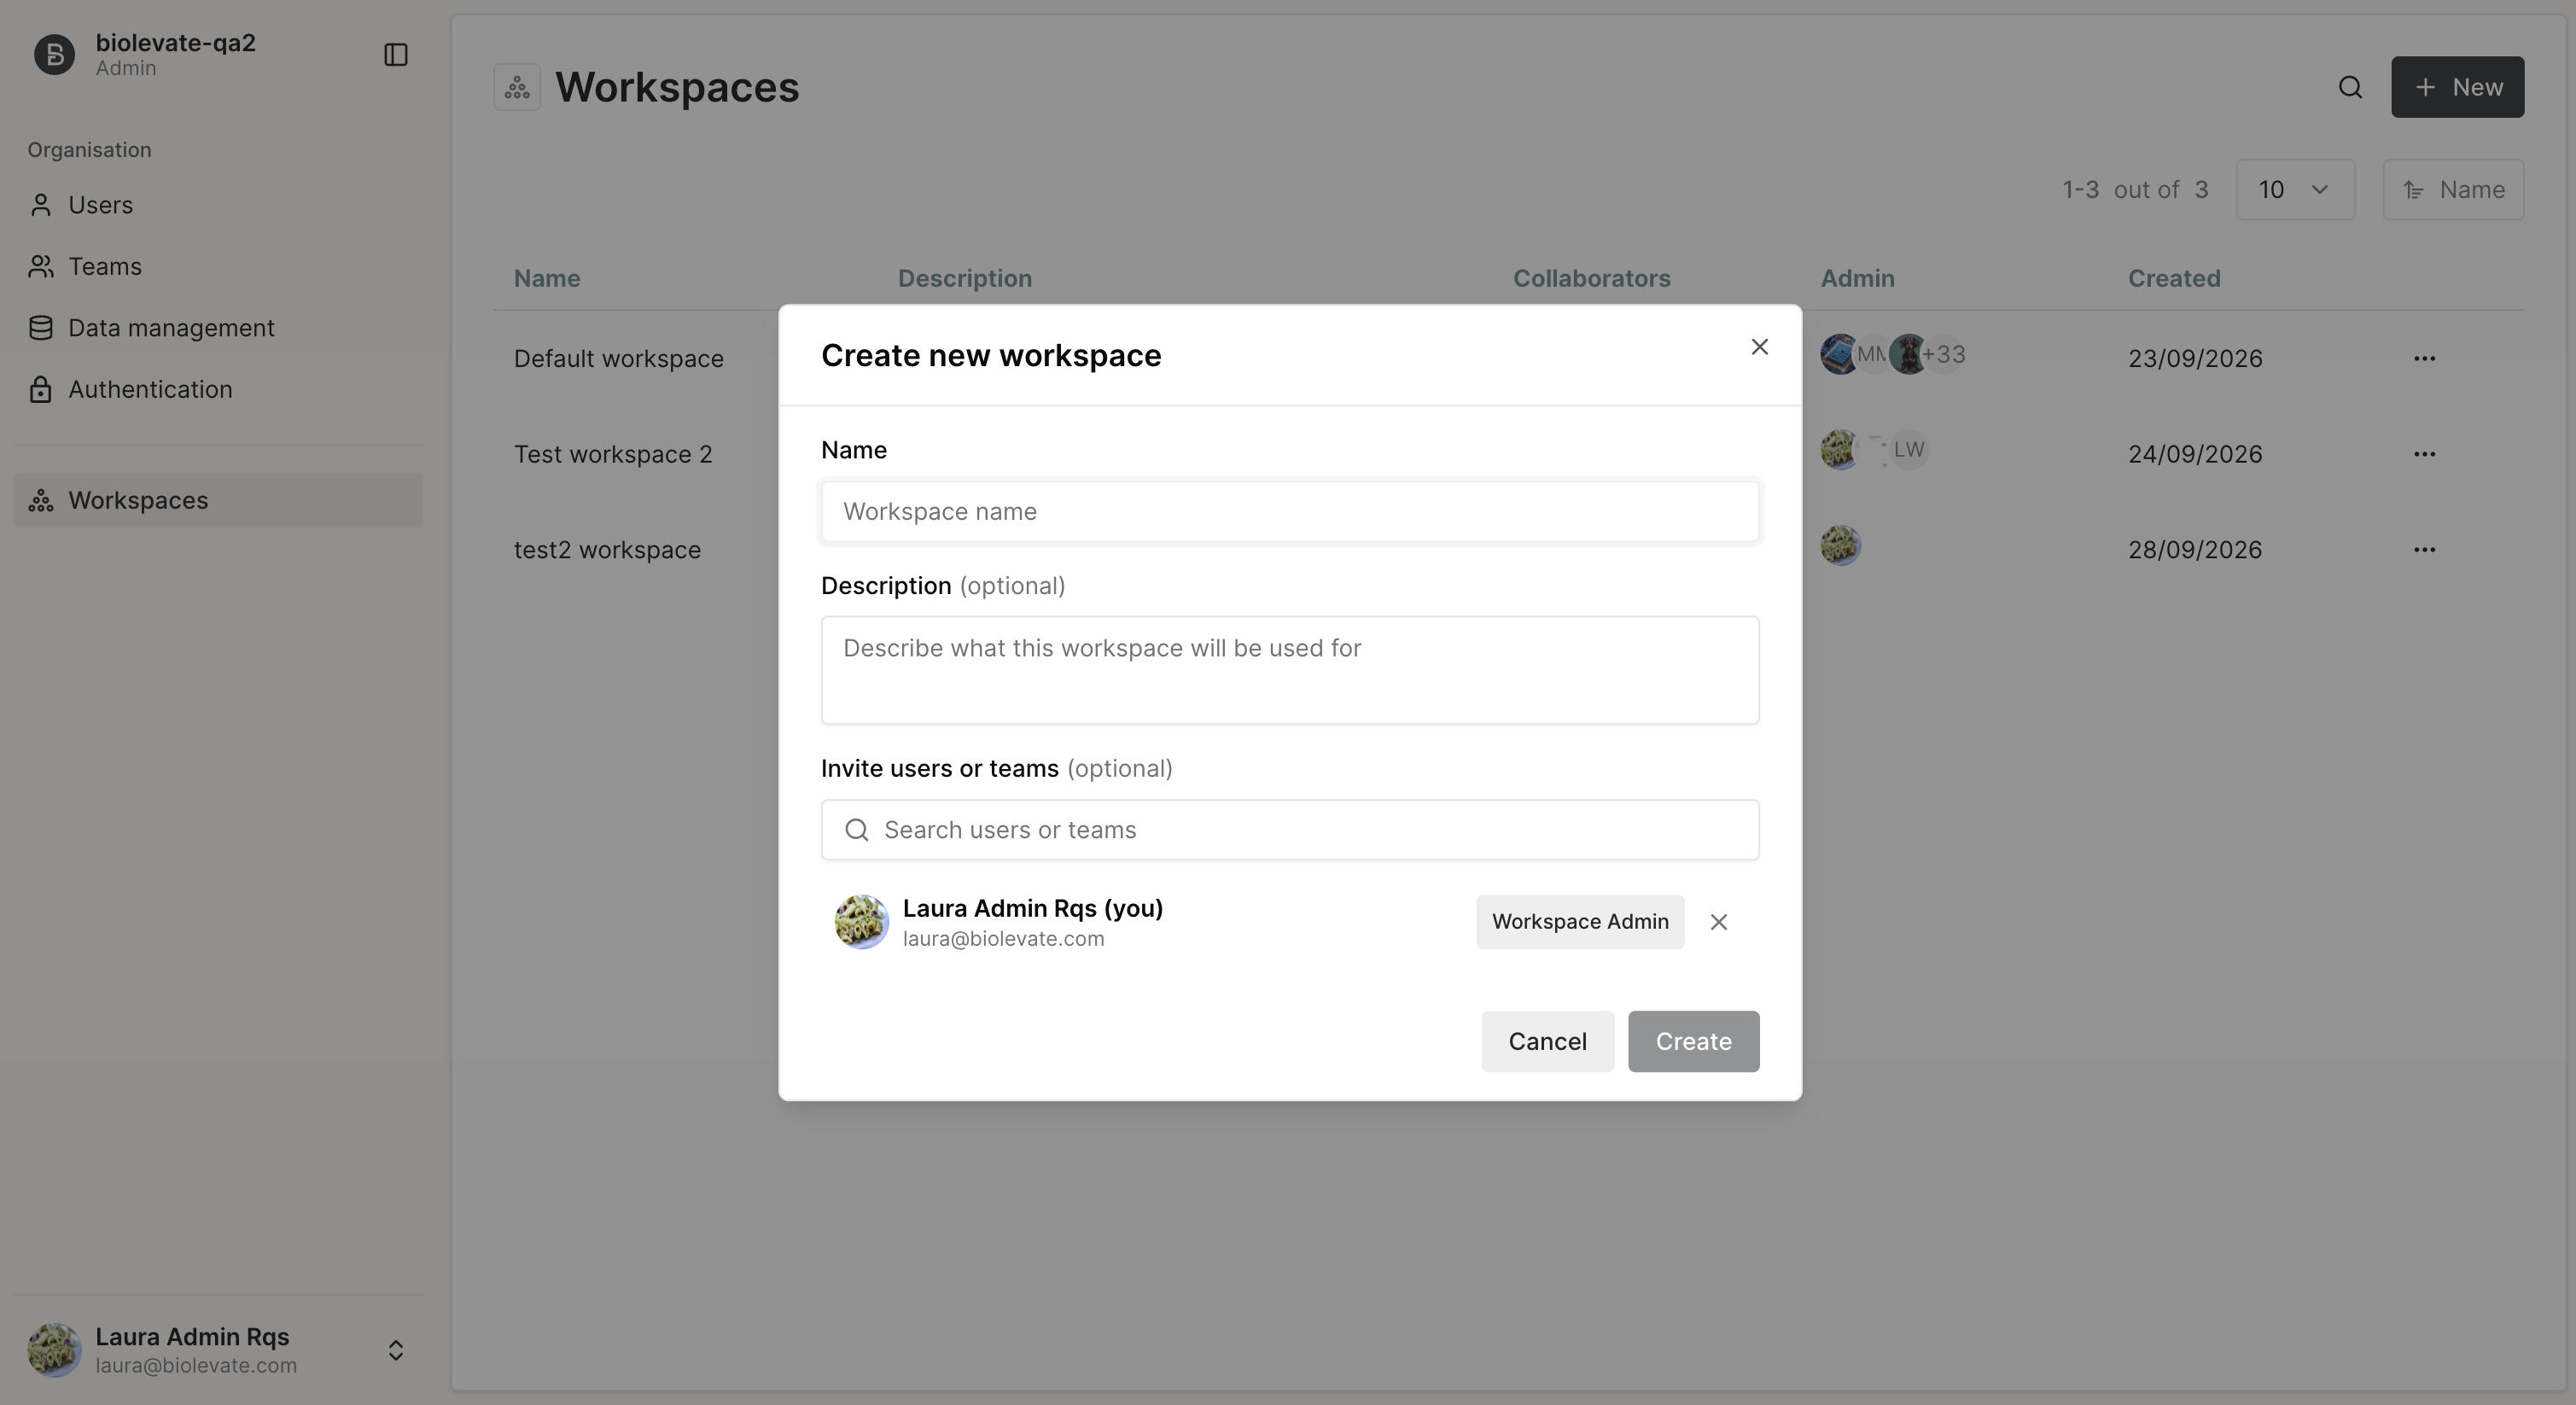
4. Click Create.
The workspace is created.
Users added to the workspace receive an email notification with a link to the workspace.
Manage a workspace
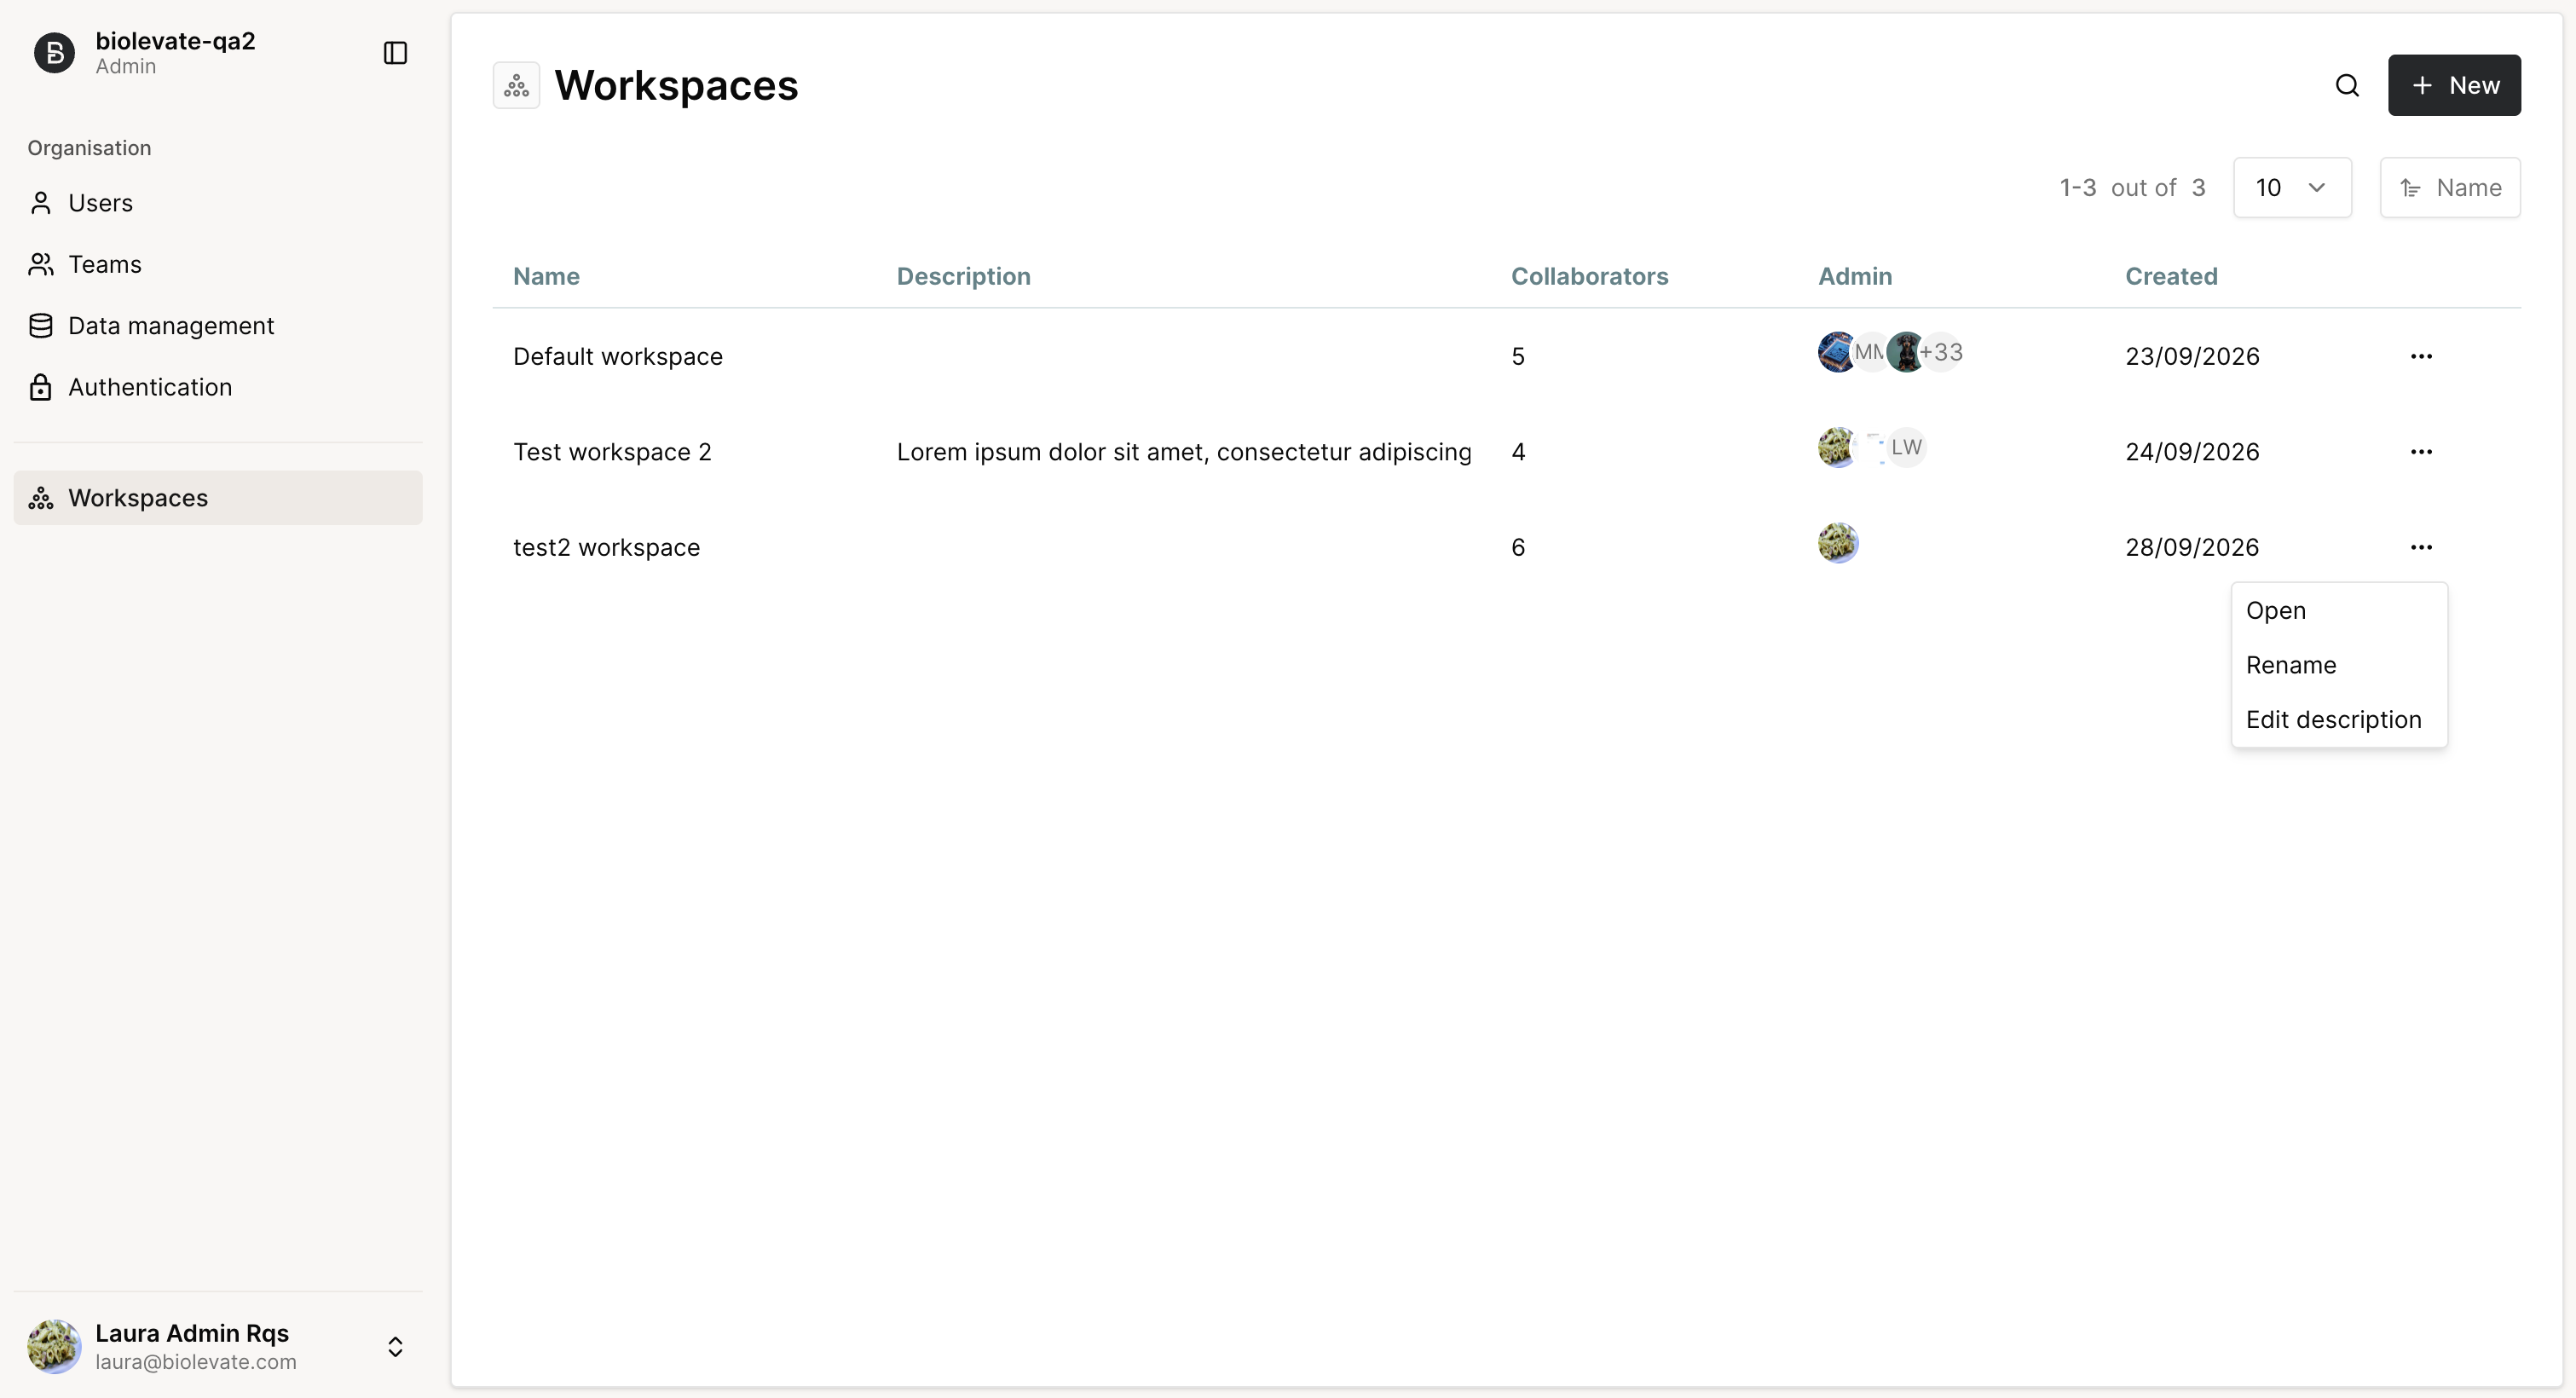
The workspaces list displays the following information:
- Name
- Description
- Number of collaborators
- Number of admins
- Creation date
An action menu is available on the right side of each row, allowing administrators to:
- Open the workspace details (also available by clicking on the workspace)
- Rename
- Edit description
Workspace roles
Workspace admins can manage the workspace users, teams, service users and repositories.
Workspace collaborators can access and use the workspace.
N.B. Access to a workspace does not automatically give access to all data within it. Access to projects, files and other artifacts is controlled by their sharing policies.
Workspace users
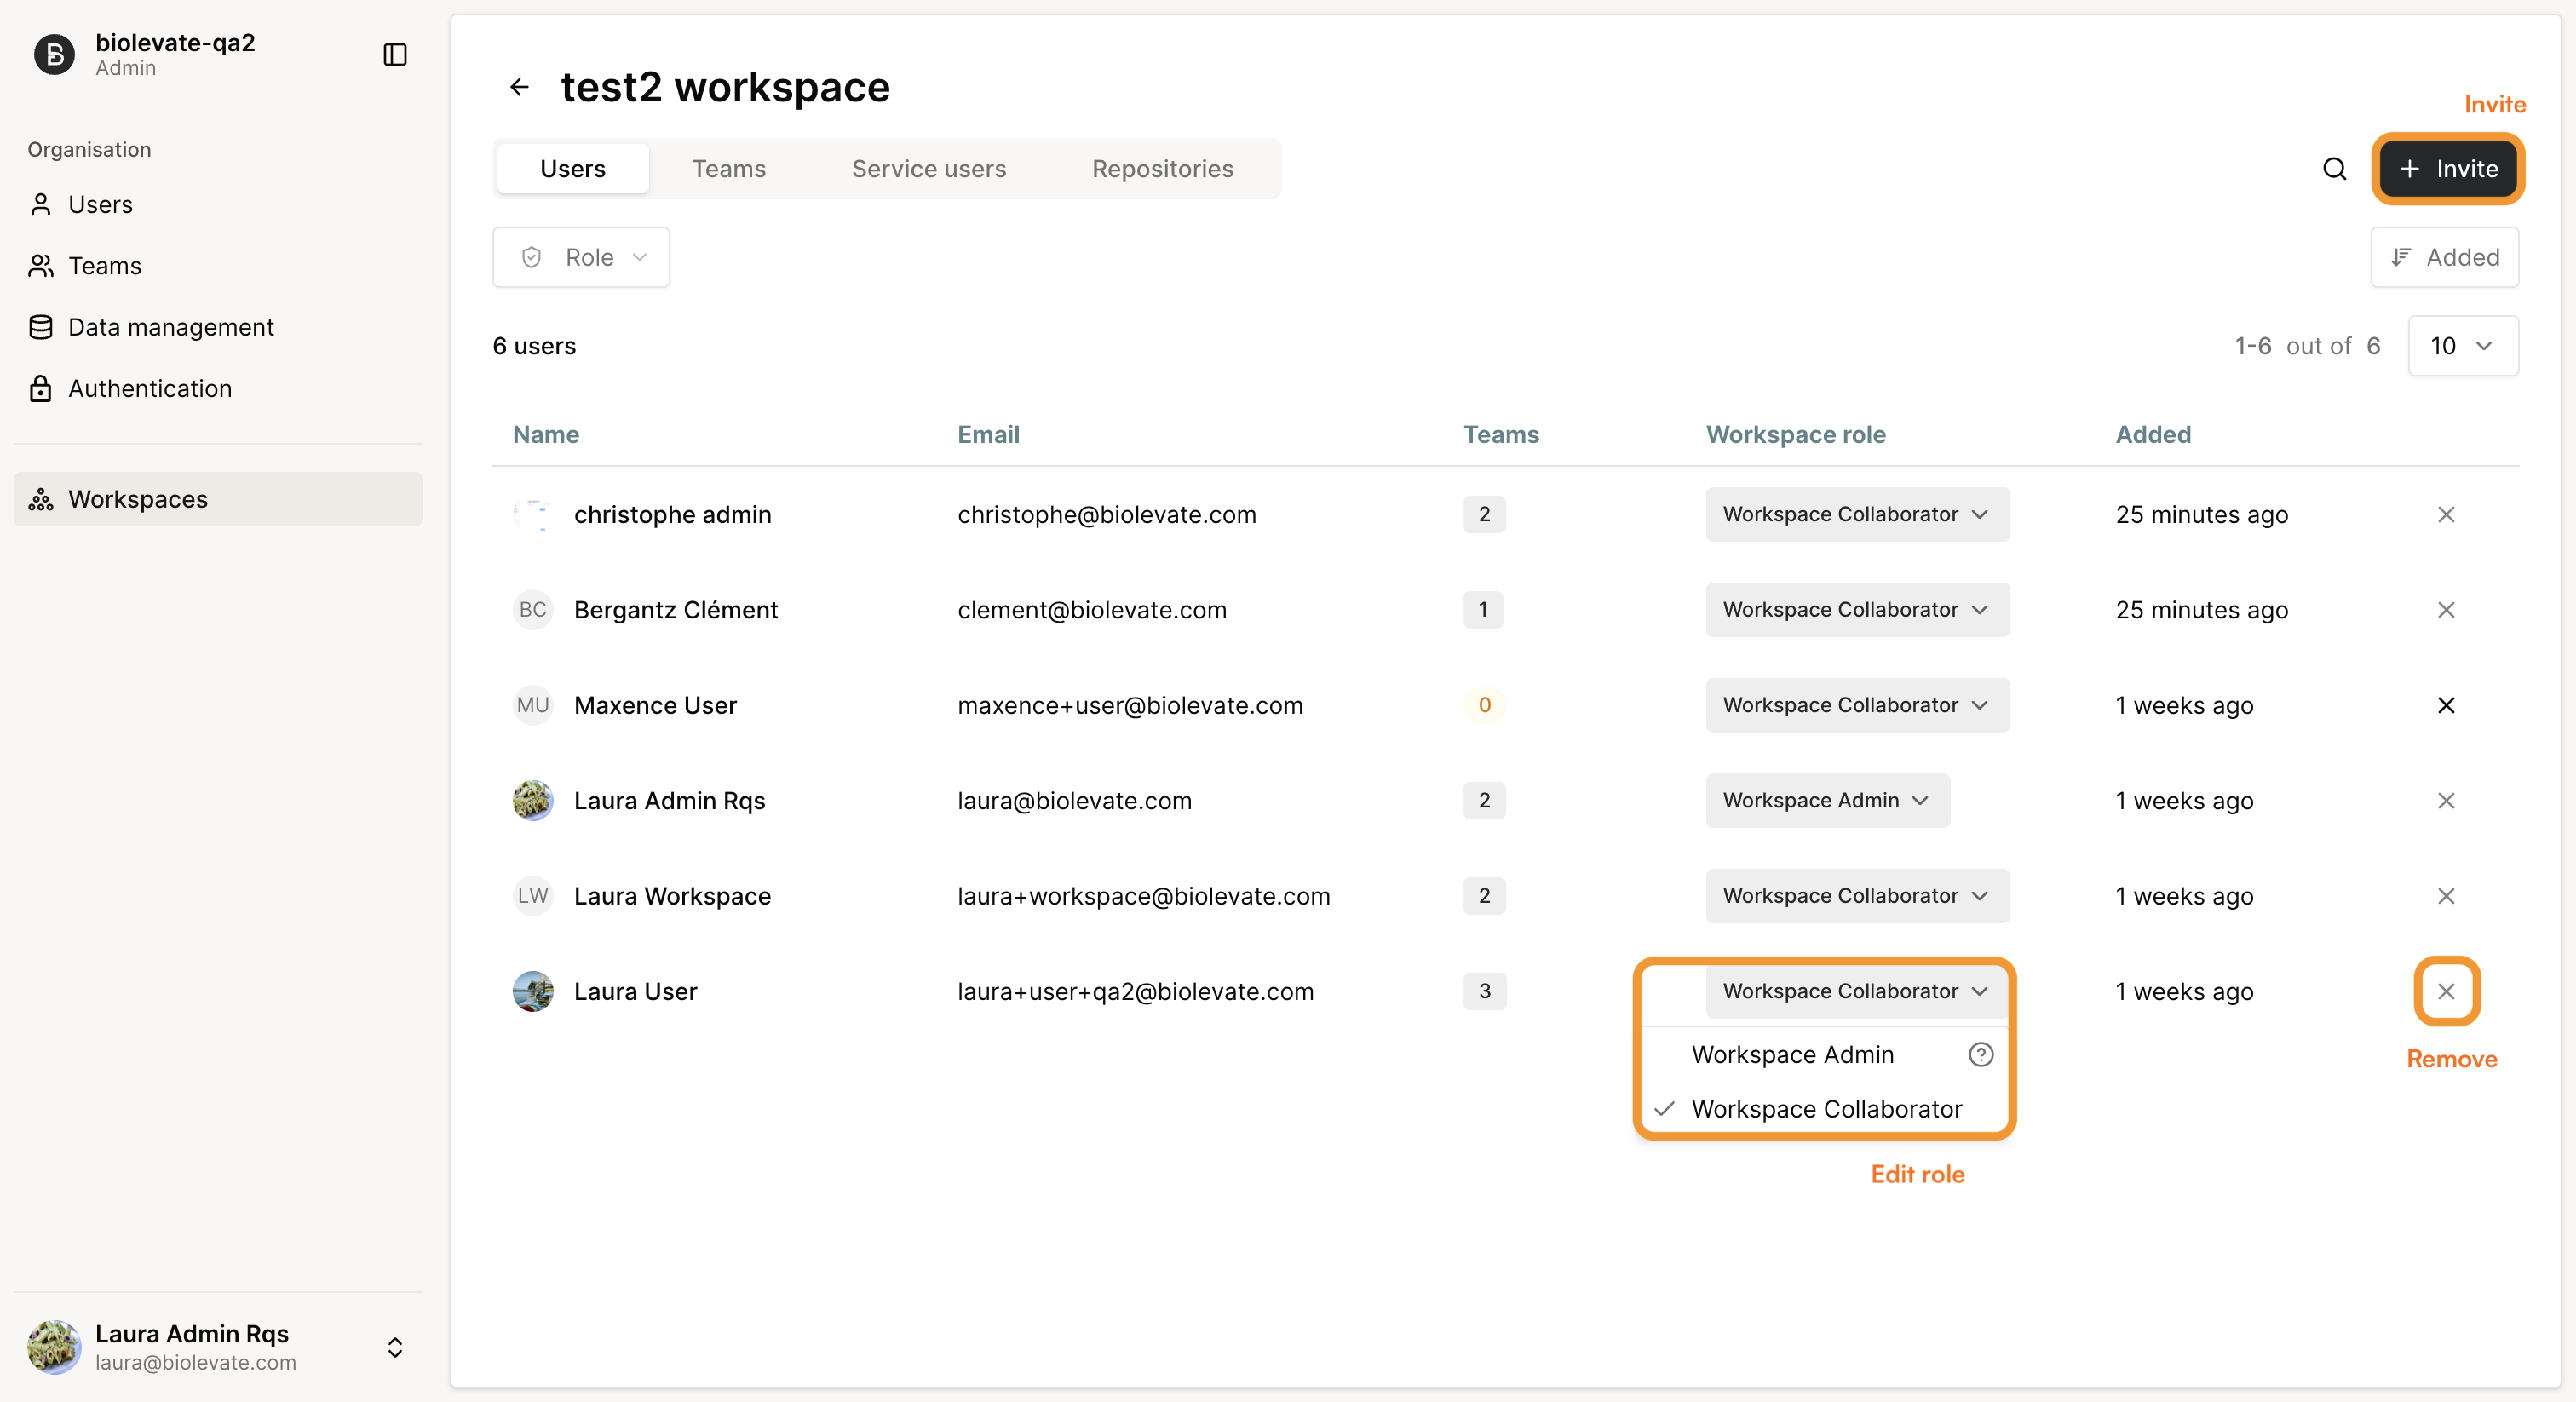
Workspace administrators can manage users within the workspace.
They can:
- Edit a user's role: change the user's role between Workspace Admin and Workspace Collaborator.
- Remove a user from the workspace: the user no longer has access to the workspace. Their access to other workspaces is not affected.
N.B. When a user is removed from a workspace, their data is kept but no longer has an owner. Workspace admins should check the data policies and make sure the appropriate users still have access.
- Invite a user: invite an existing organization user to the workspace or invite a new user to the organization and add them to the workspace at the same time.
Workspace teams
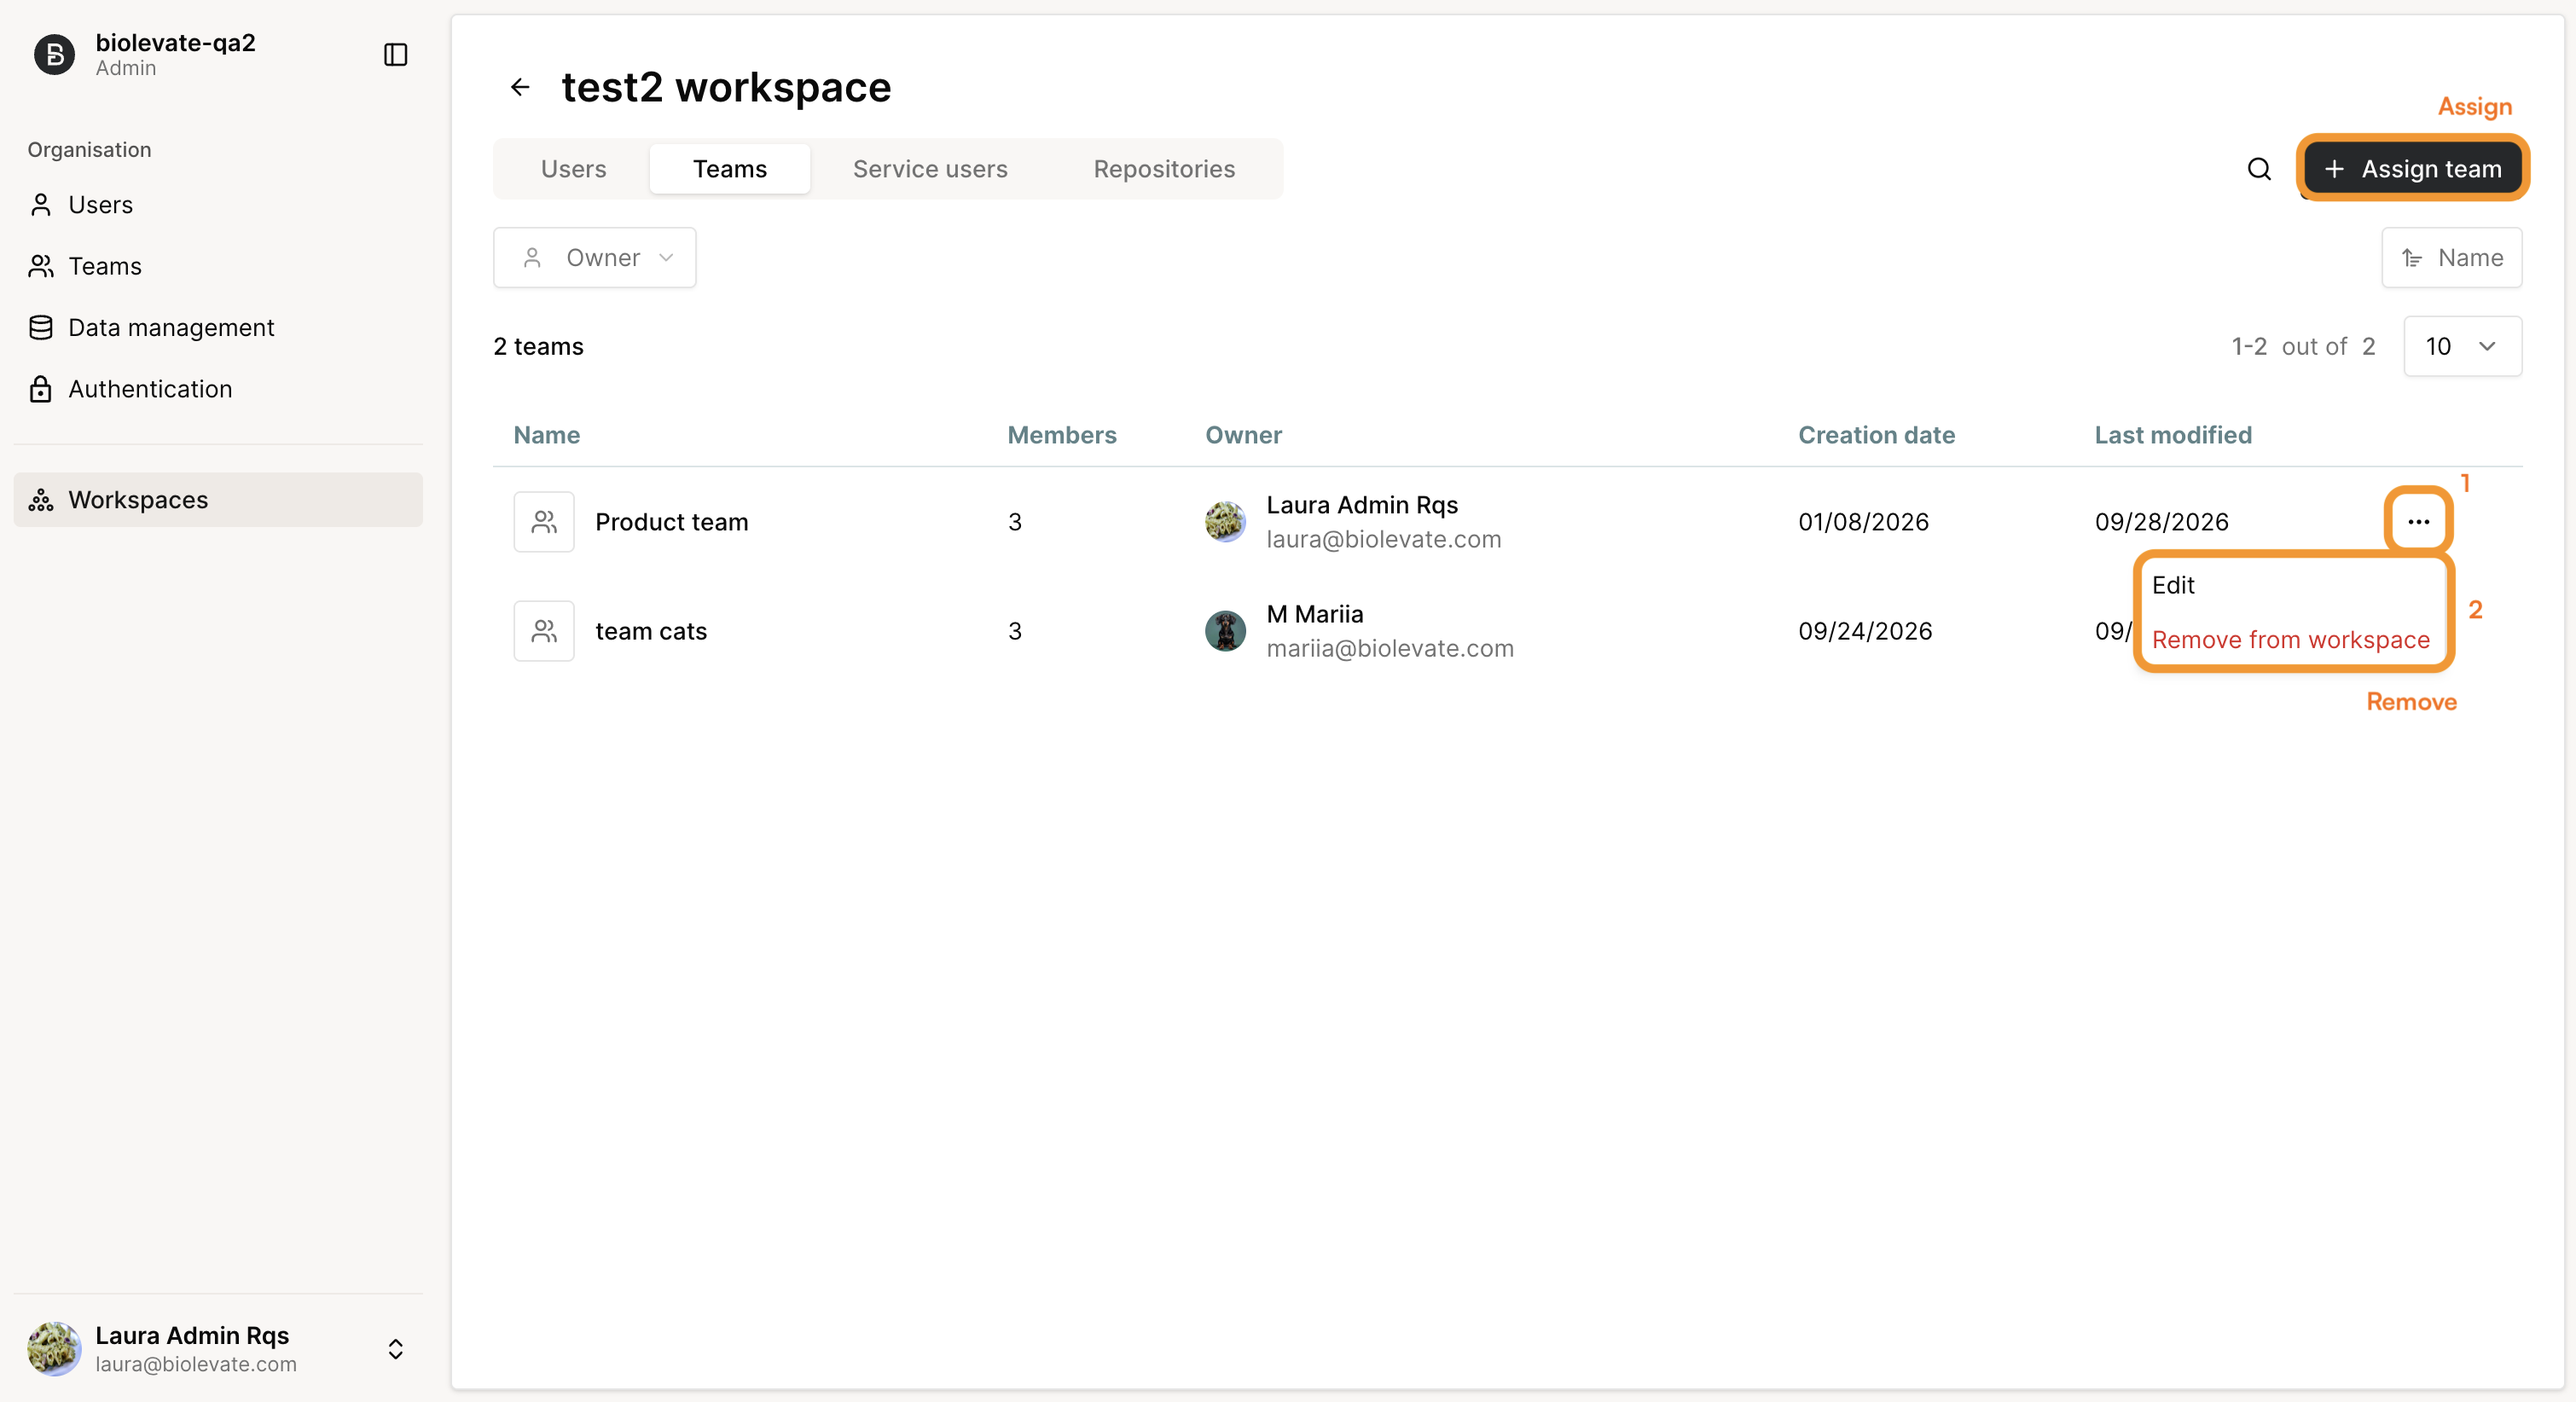
Workspace administrators can manage teams within the workspace.
They can:
Remove a team from the workspace: the team is no longer assigned to the workspace and its members no longer get access to the workspace through this team (they can still have access if they were added as Users directly).
Assign a team: add an existing organization team to the workspace or create a new team and assign it to the workspace at the same time.
N.B. If a user gets access to a workspace in several ways, their highest permission is applied.
Workspace service users
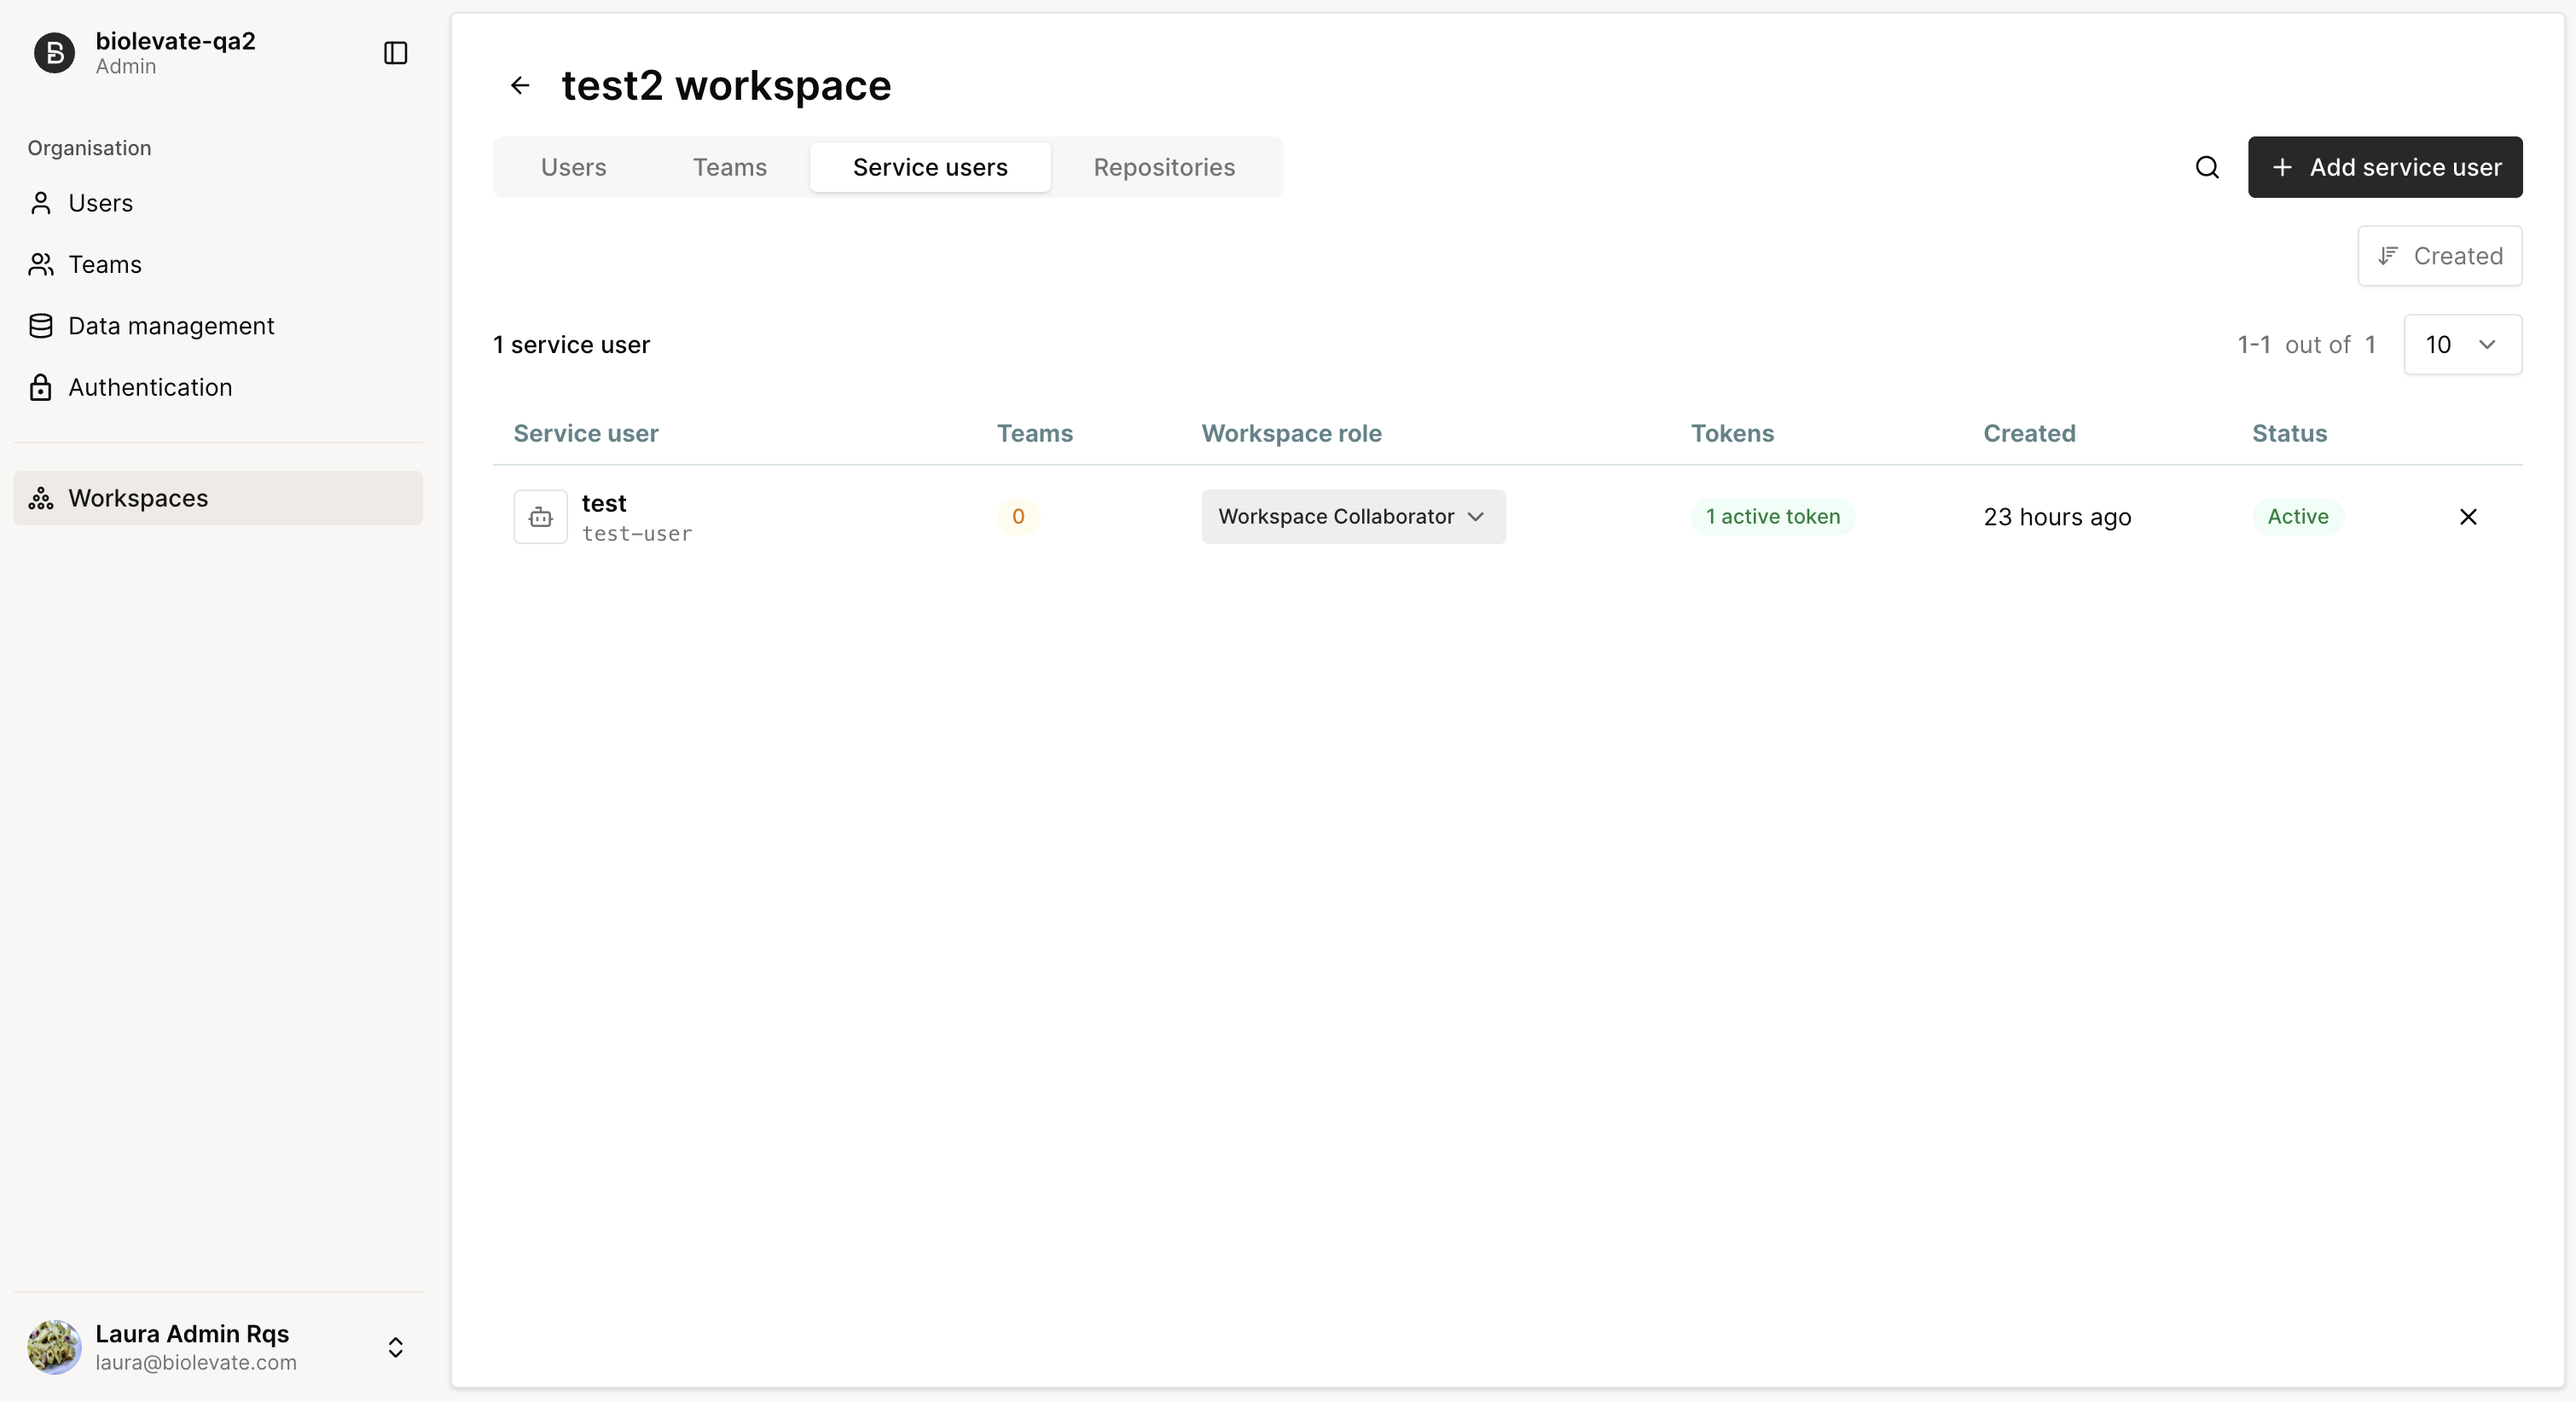
Workspace administrators can manage service users within the workspace.
They can manage service user access in the same way as other workspace users.
To know more about service users, please read the Service Users documentation.
Workspace repositories
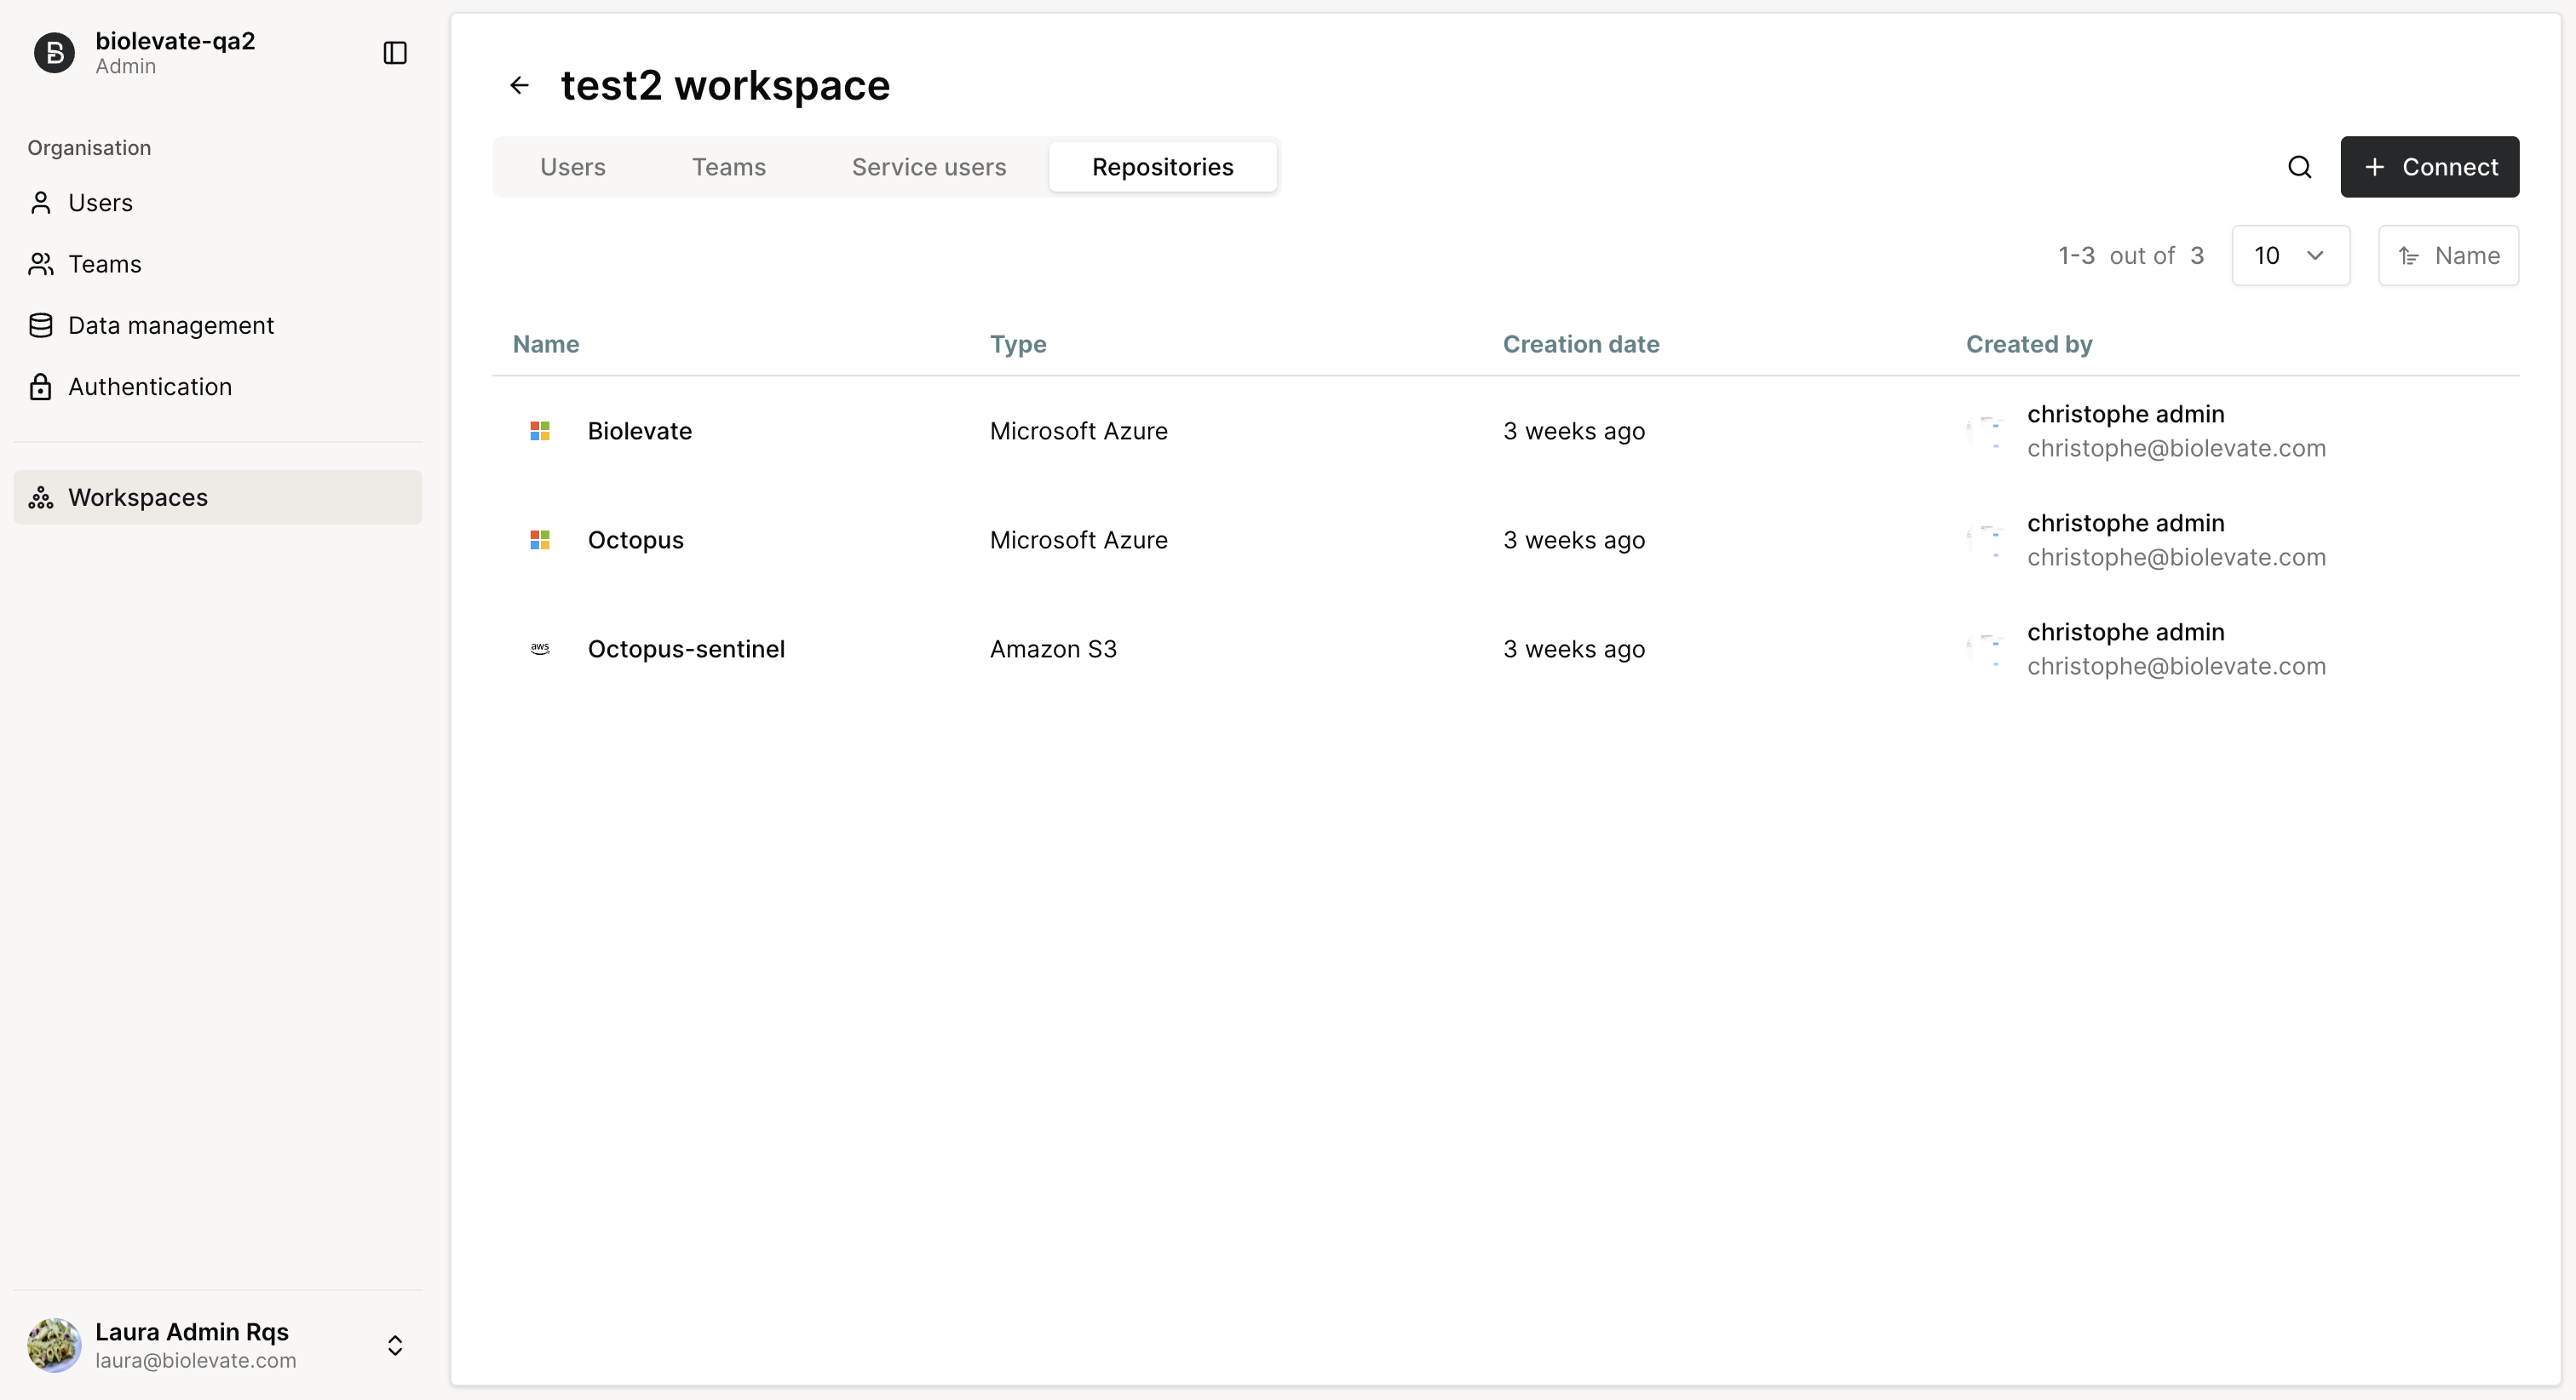
Workspace administrators can manage repositories within the workspace.
They can connect available organization repositories or configure a repository directly.
To know more about repositories, please read the Providers documentation.
Access a workspace
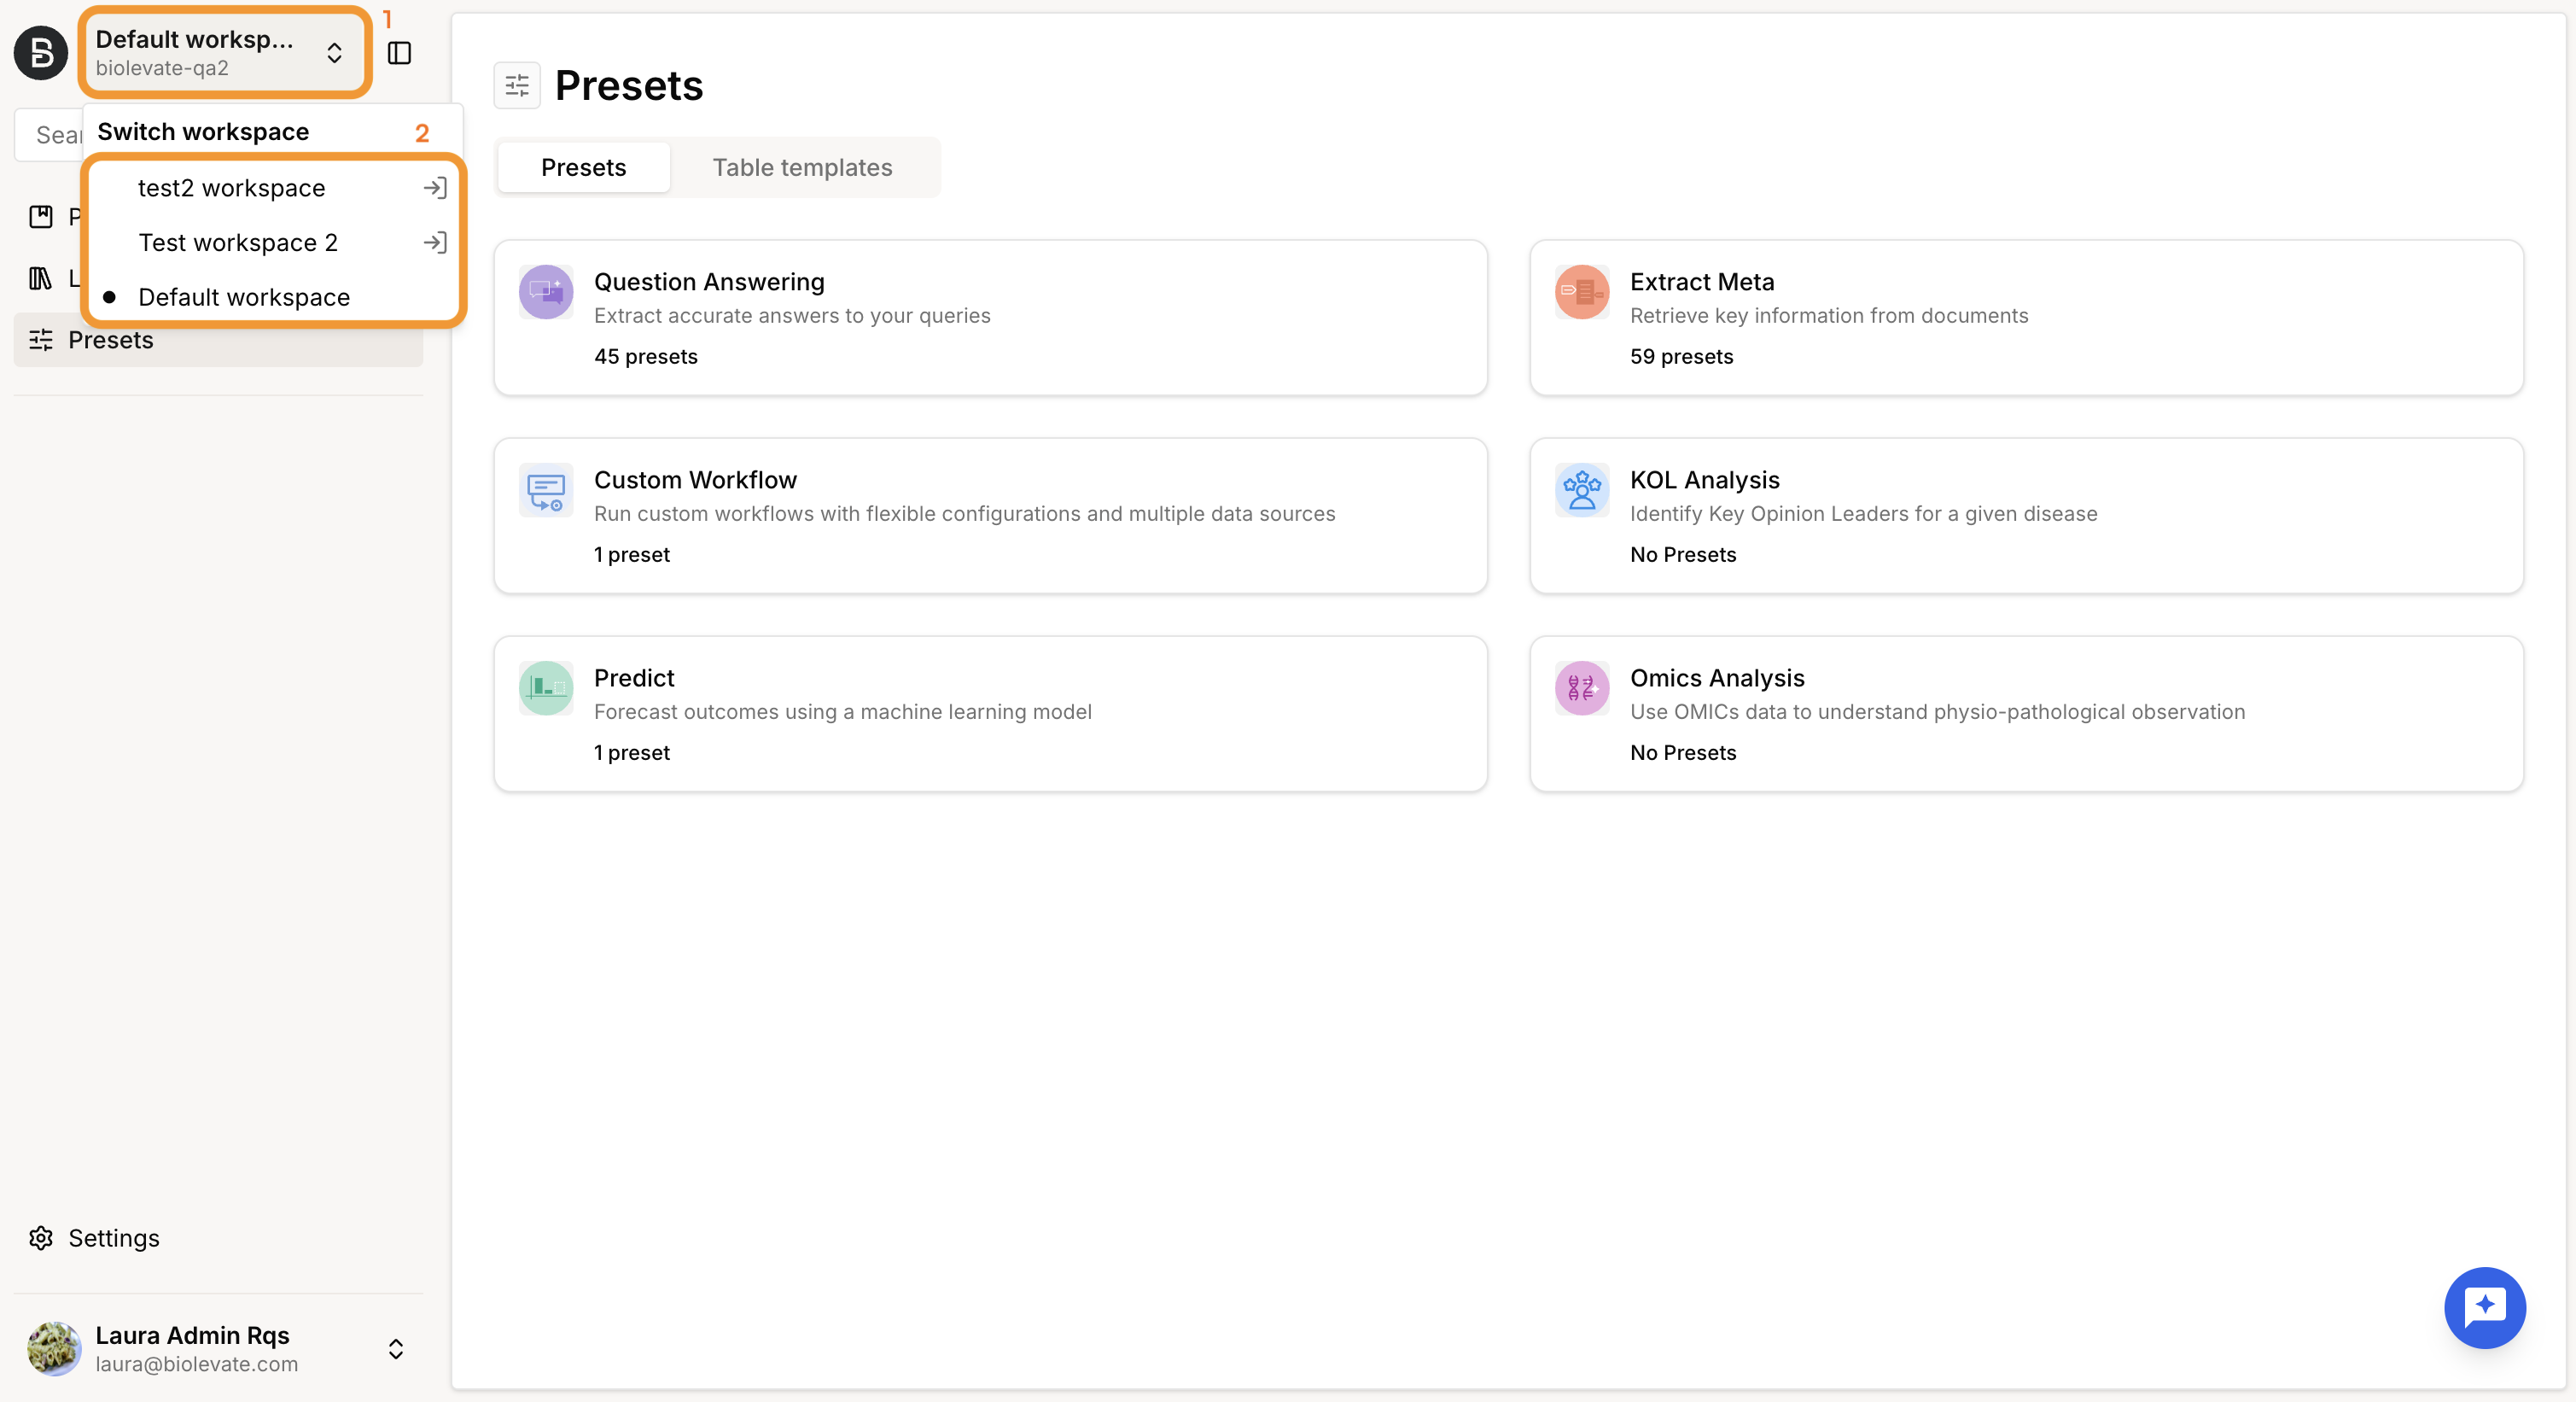
If you belong to several workspaces, you can switch between them from the workspace selector in Biolevate app.
Each workspace has its own:
Projects
Files
Presets
Repositories
Teams
Other workspace data
Data is separated between workspaces. You can only access the data of the workspaces you have access to.
Was this article helpful?
That’s Great!
Thank you for your feedback
Sorry! We couldn't be helpful
Thank you for your feedback
Feedback sent
We appreciate your effort and will try to fix the article