| Permissions |
|
| Related readings |
Policies allow to create groups of users with specific rights: write or read.
They can be applied on projects, presets, repositories, collections, groups, searches and templates to facilitate the collaboration on the platform.
TABLE OF CONTENTS
Access policies settings
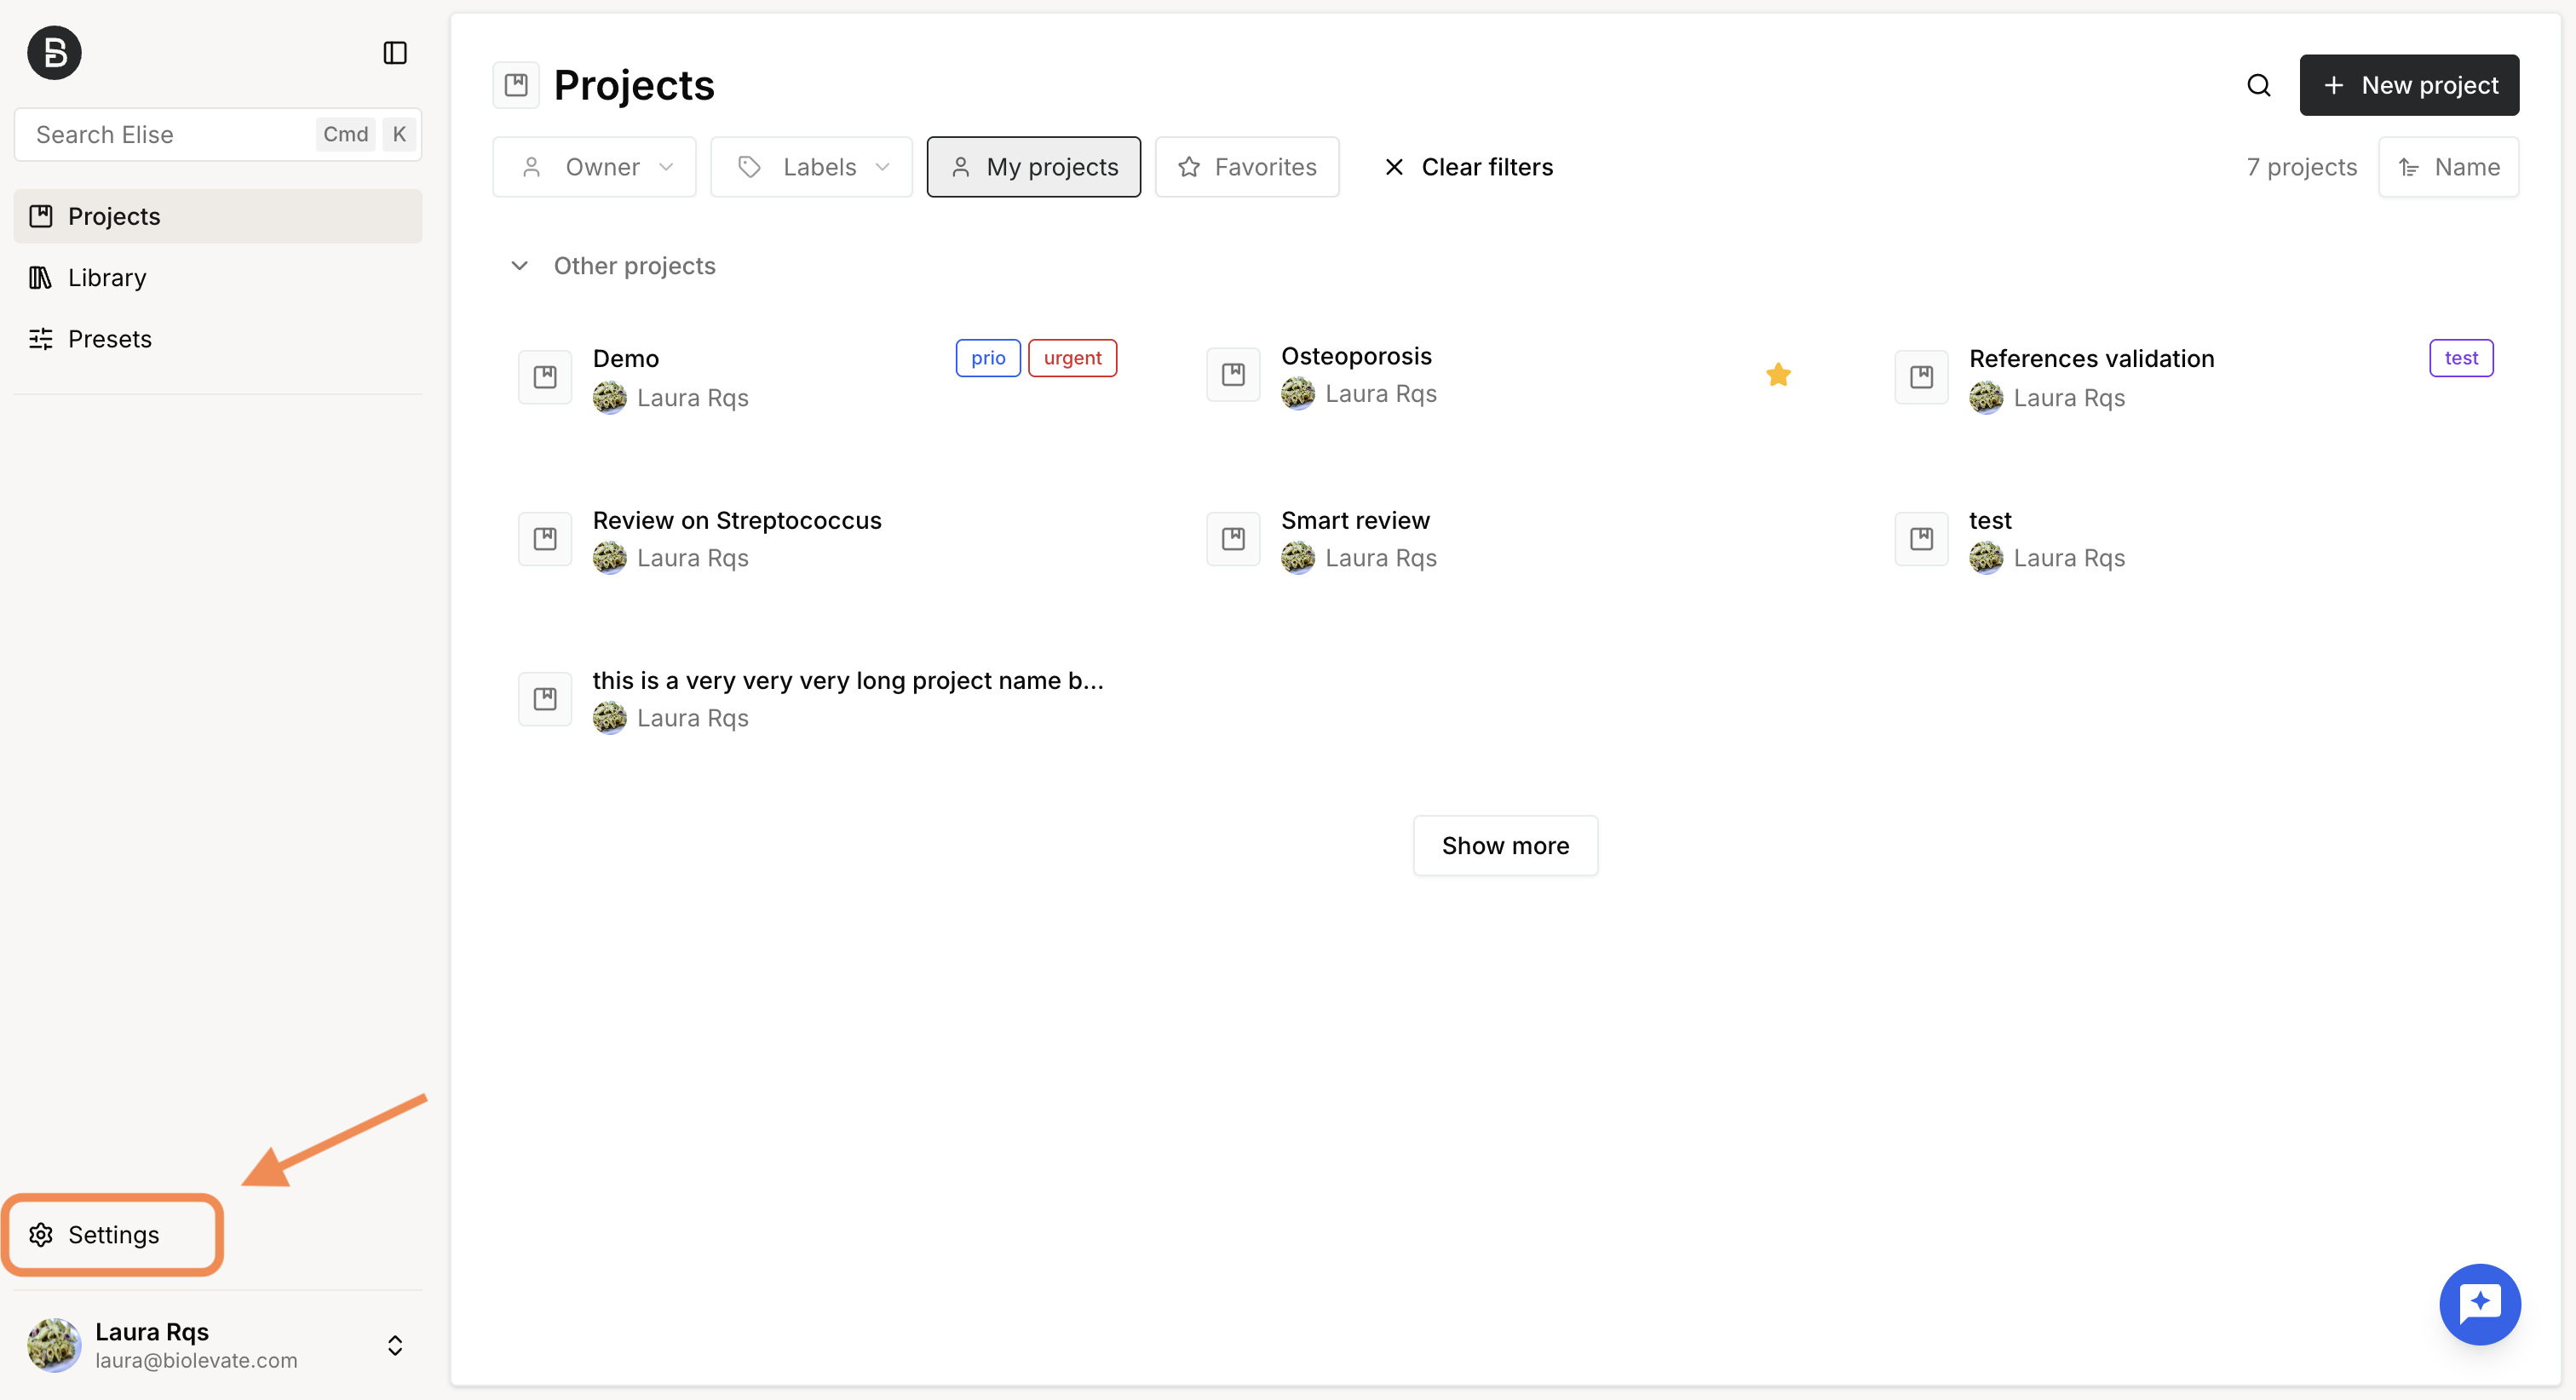
You can access the Policies tab from the Settings, which are available at the bottom left of the screen.
Manage policies
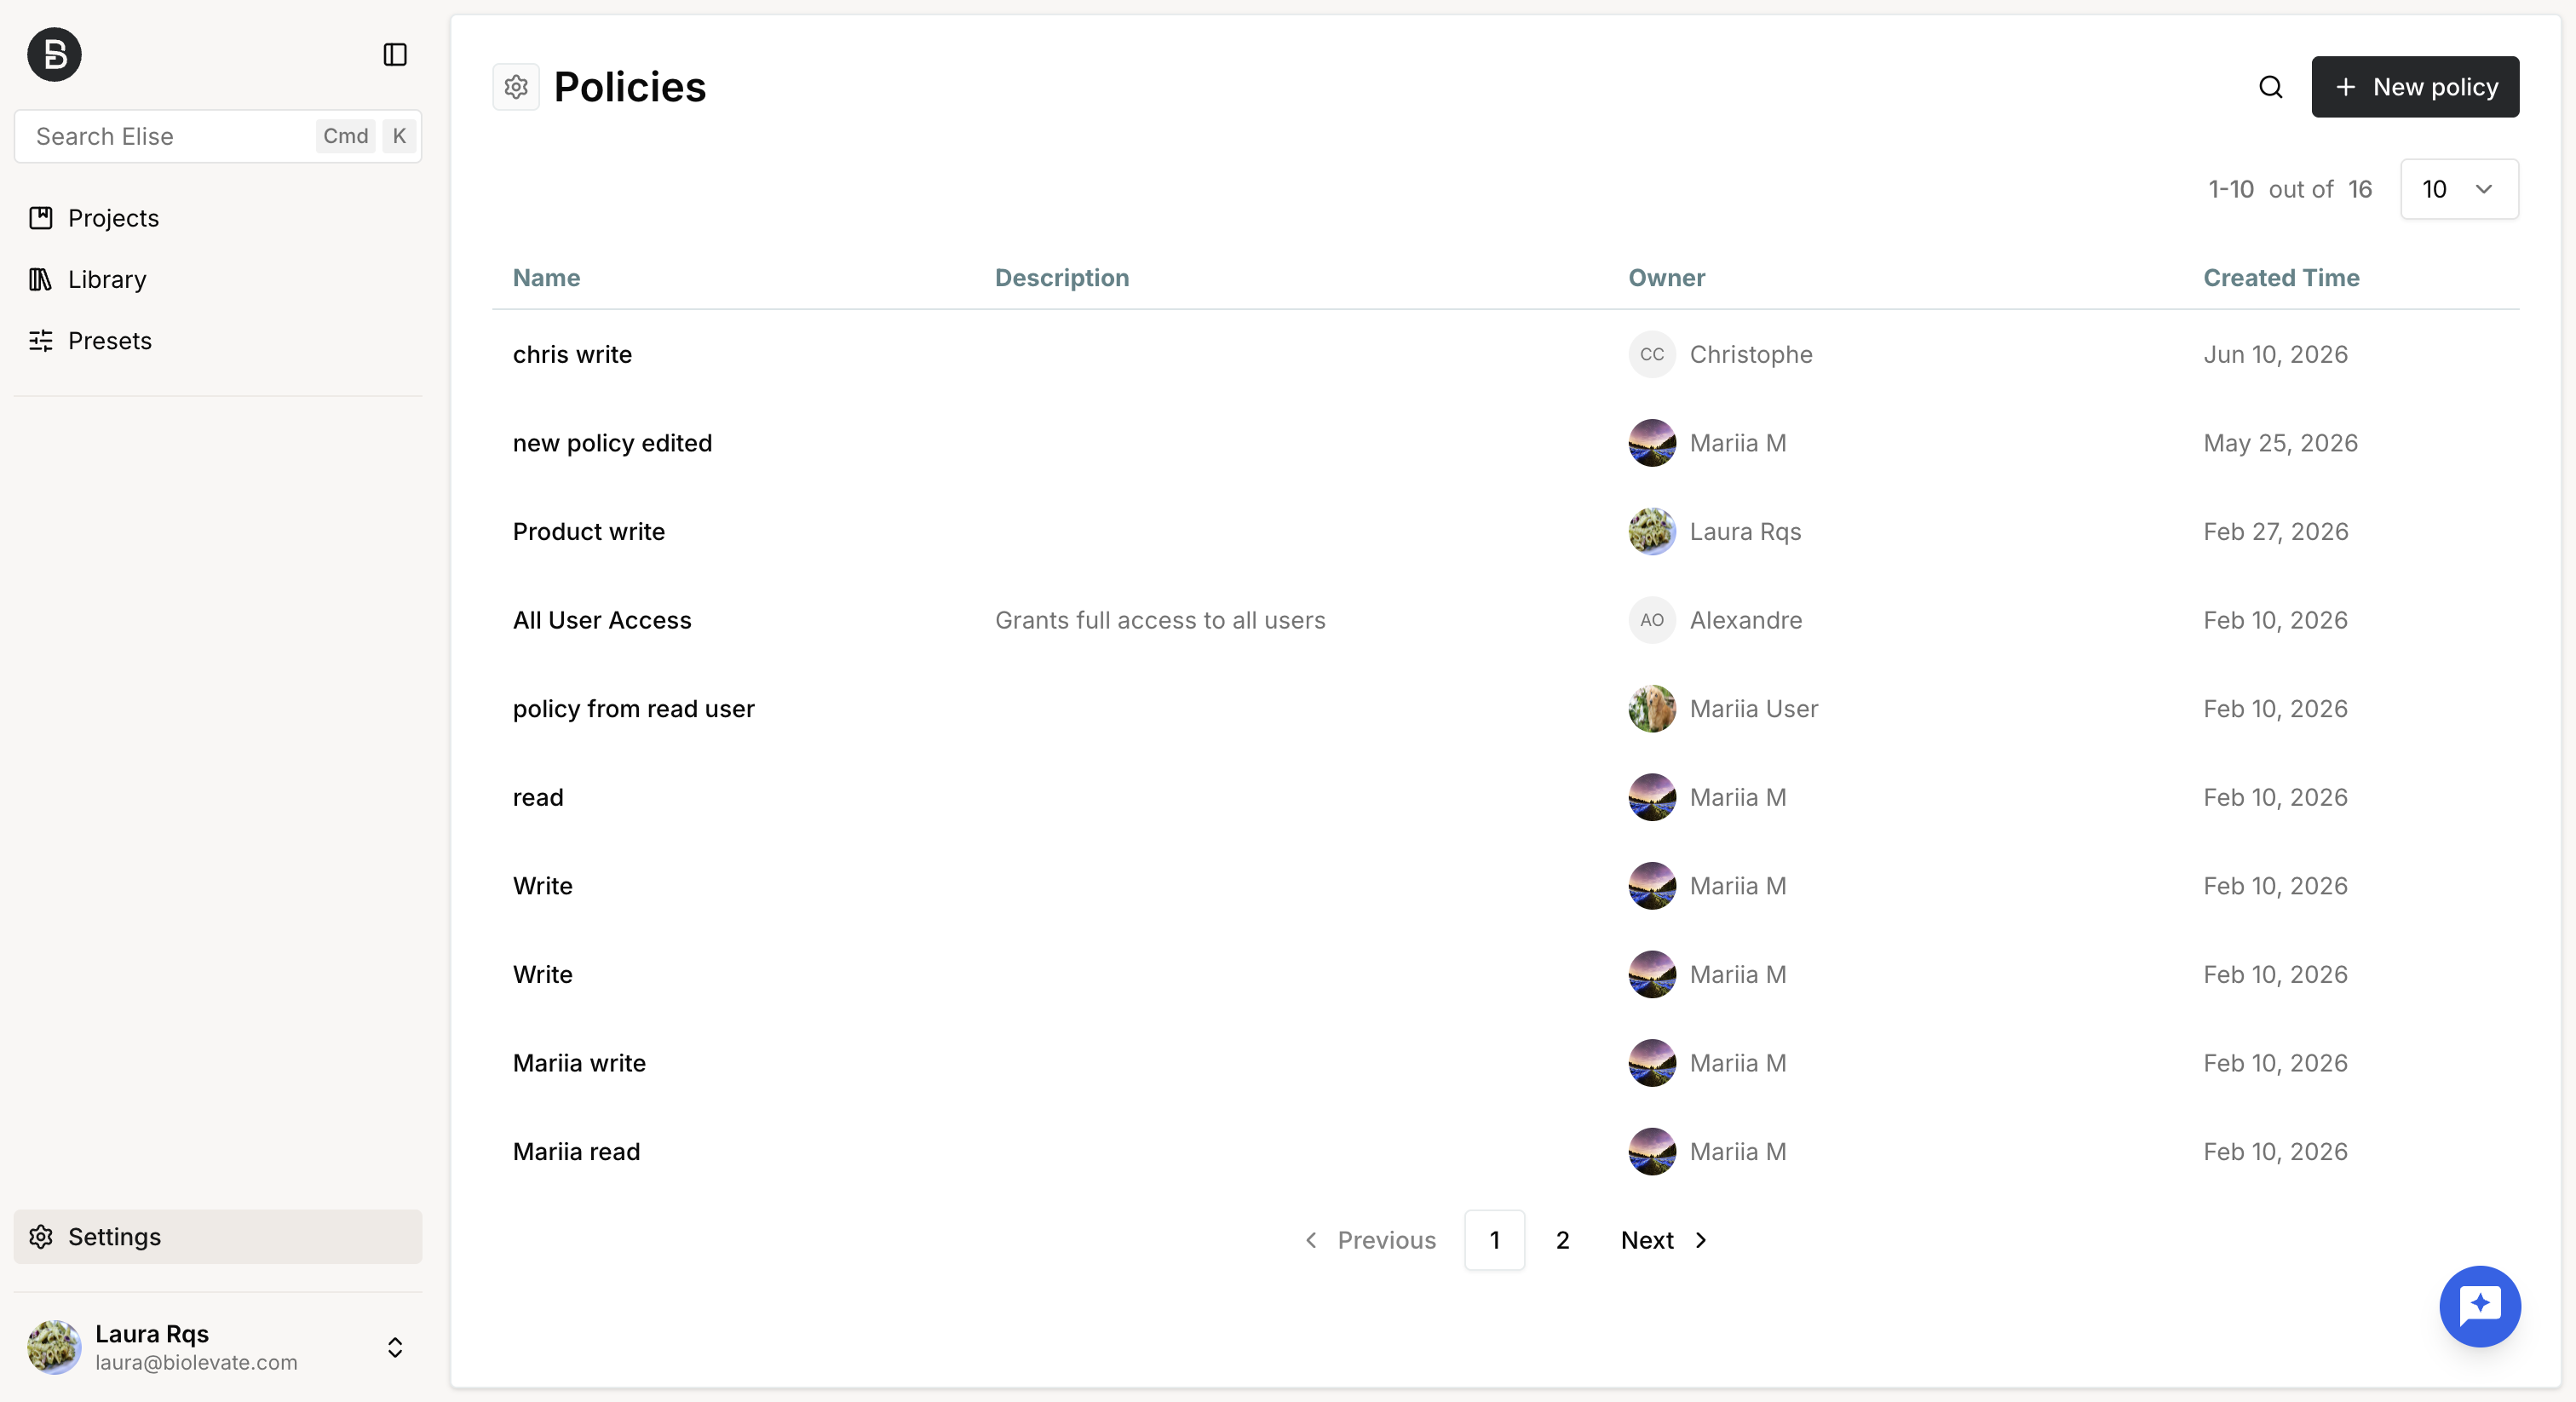
The Policies tab lets you view, create and edit access policies.
- System administrators can view and manage all policies.
- Regular users can view and manage only the policies they own.
For each policy, the list displays:
- Name
- Description (if provided)
- Owner
- Creation date
View a policy
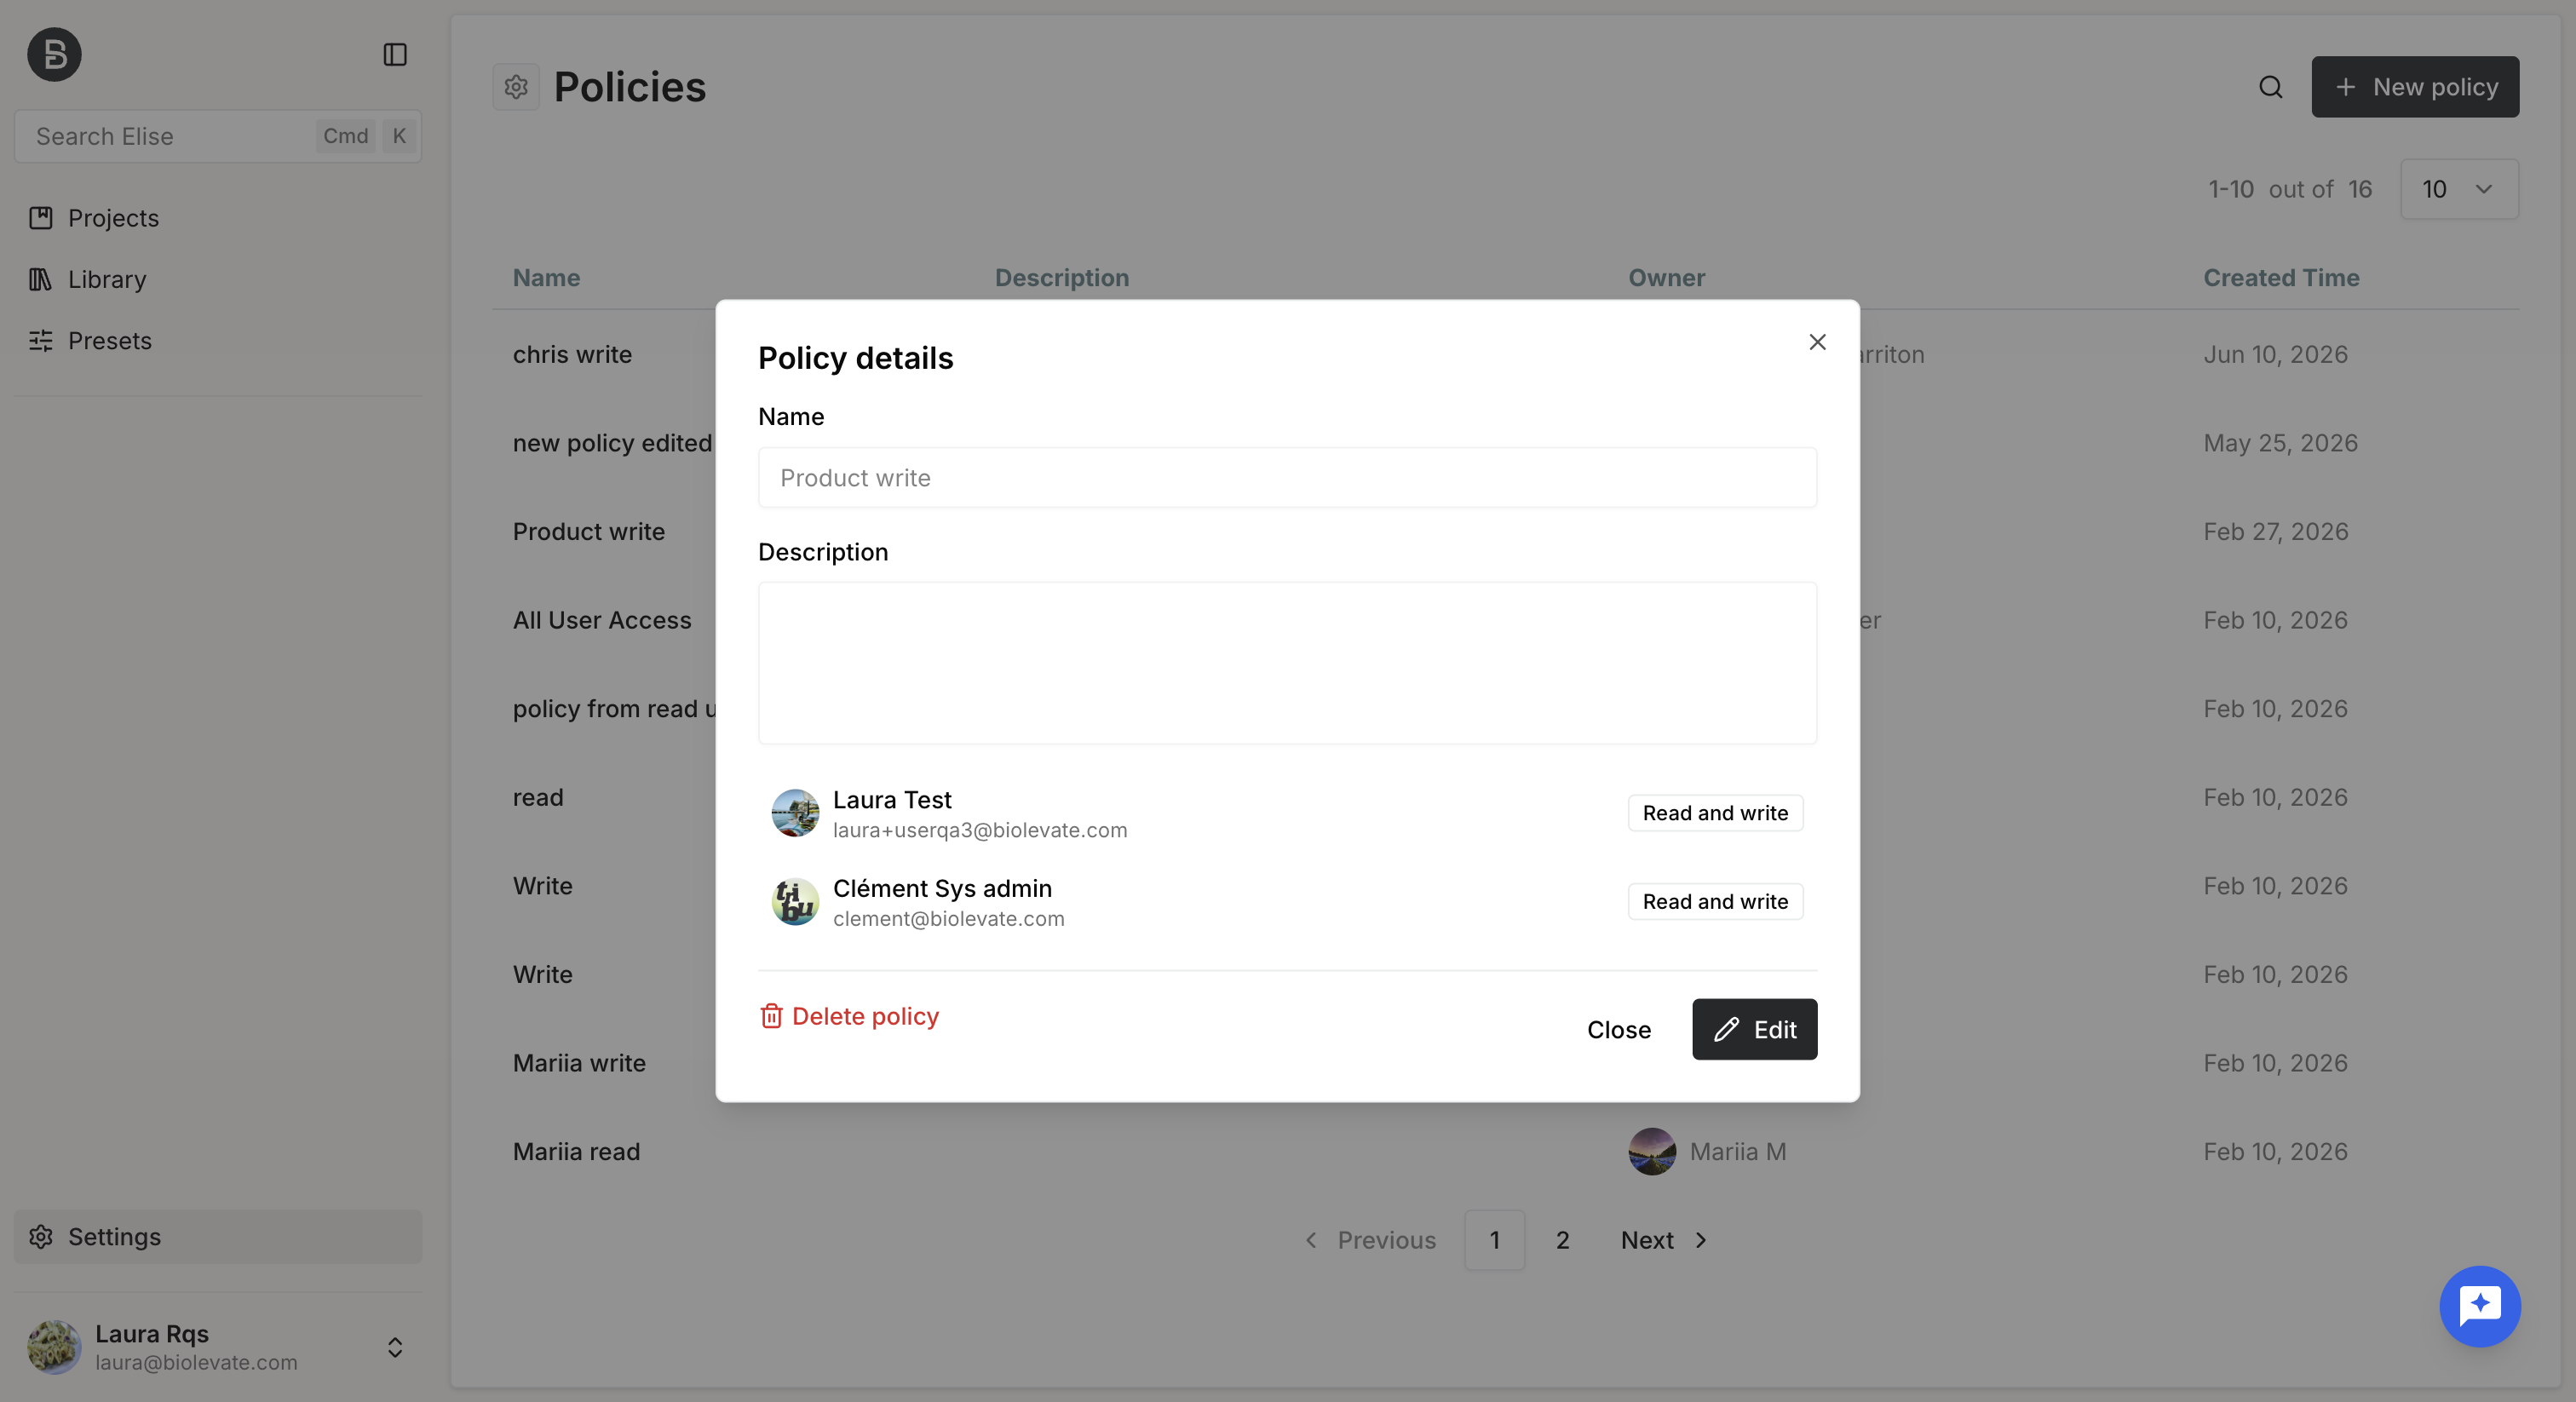
Click a policy to open its details.
The policy details dialog displays:
- The full description the policy
- The users assigned to the policy
- The permission level granted to each user
Edit a policy
From the policy details dialog, click "Edit" to modify the policy.
You can update:
- Policy name
- Description
- Assigned users
- User permissions
You can add new users to a policy, provided they have already been invited to the platform.
A policy cannot be saved unless it contains:
- A policy name
- At least one user with a permission assigned
Create a policy
Policies can be created from the general settings or from the object settings for projects, presets, providers, collections, searches and templates.
To create a policy for an object, you must either:
- Own the object, or
- Be a system administrator
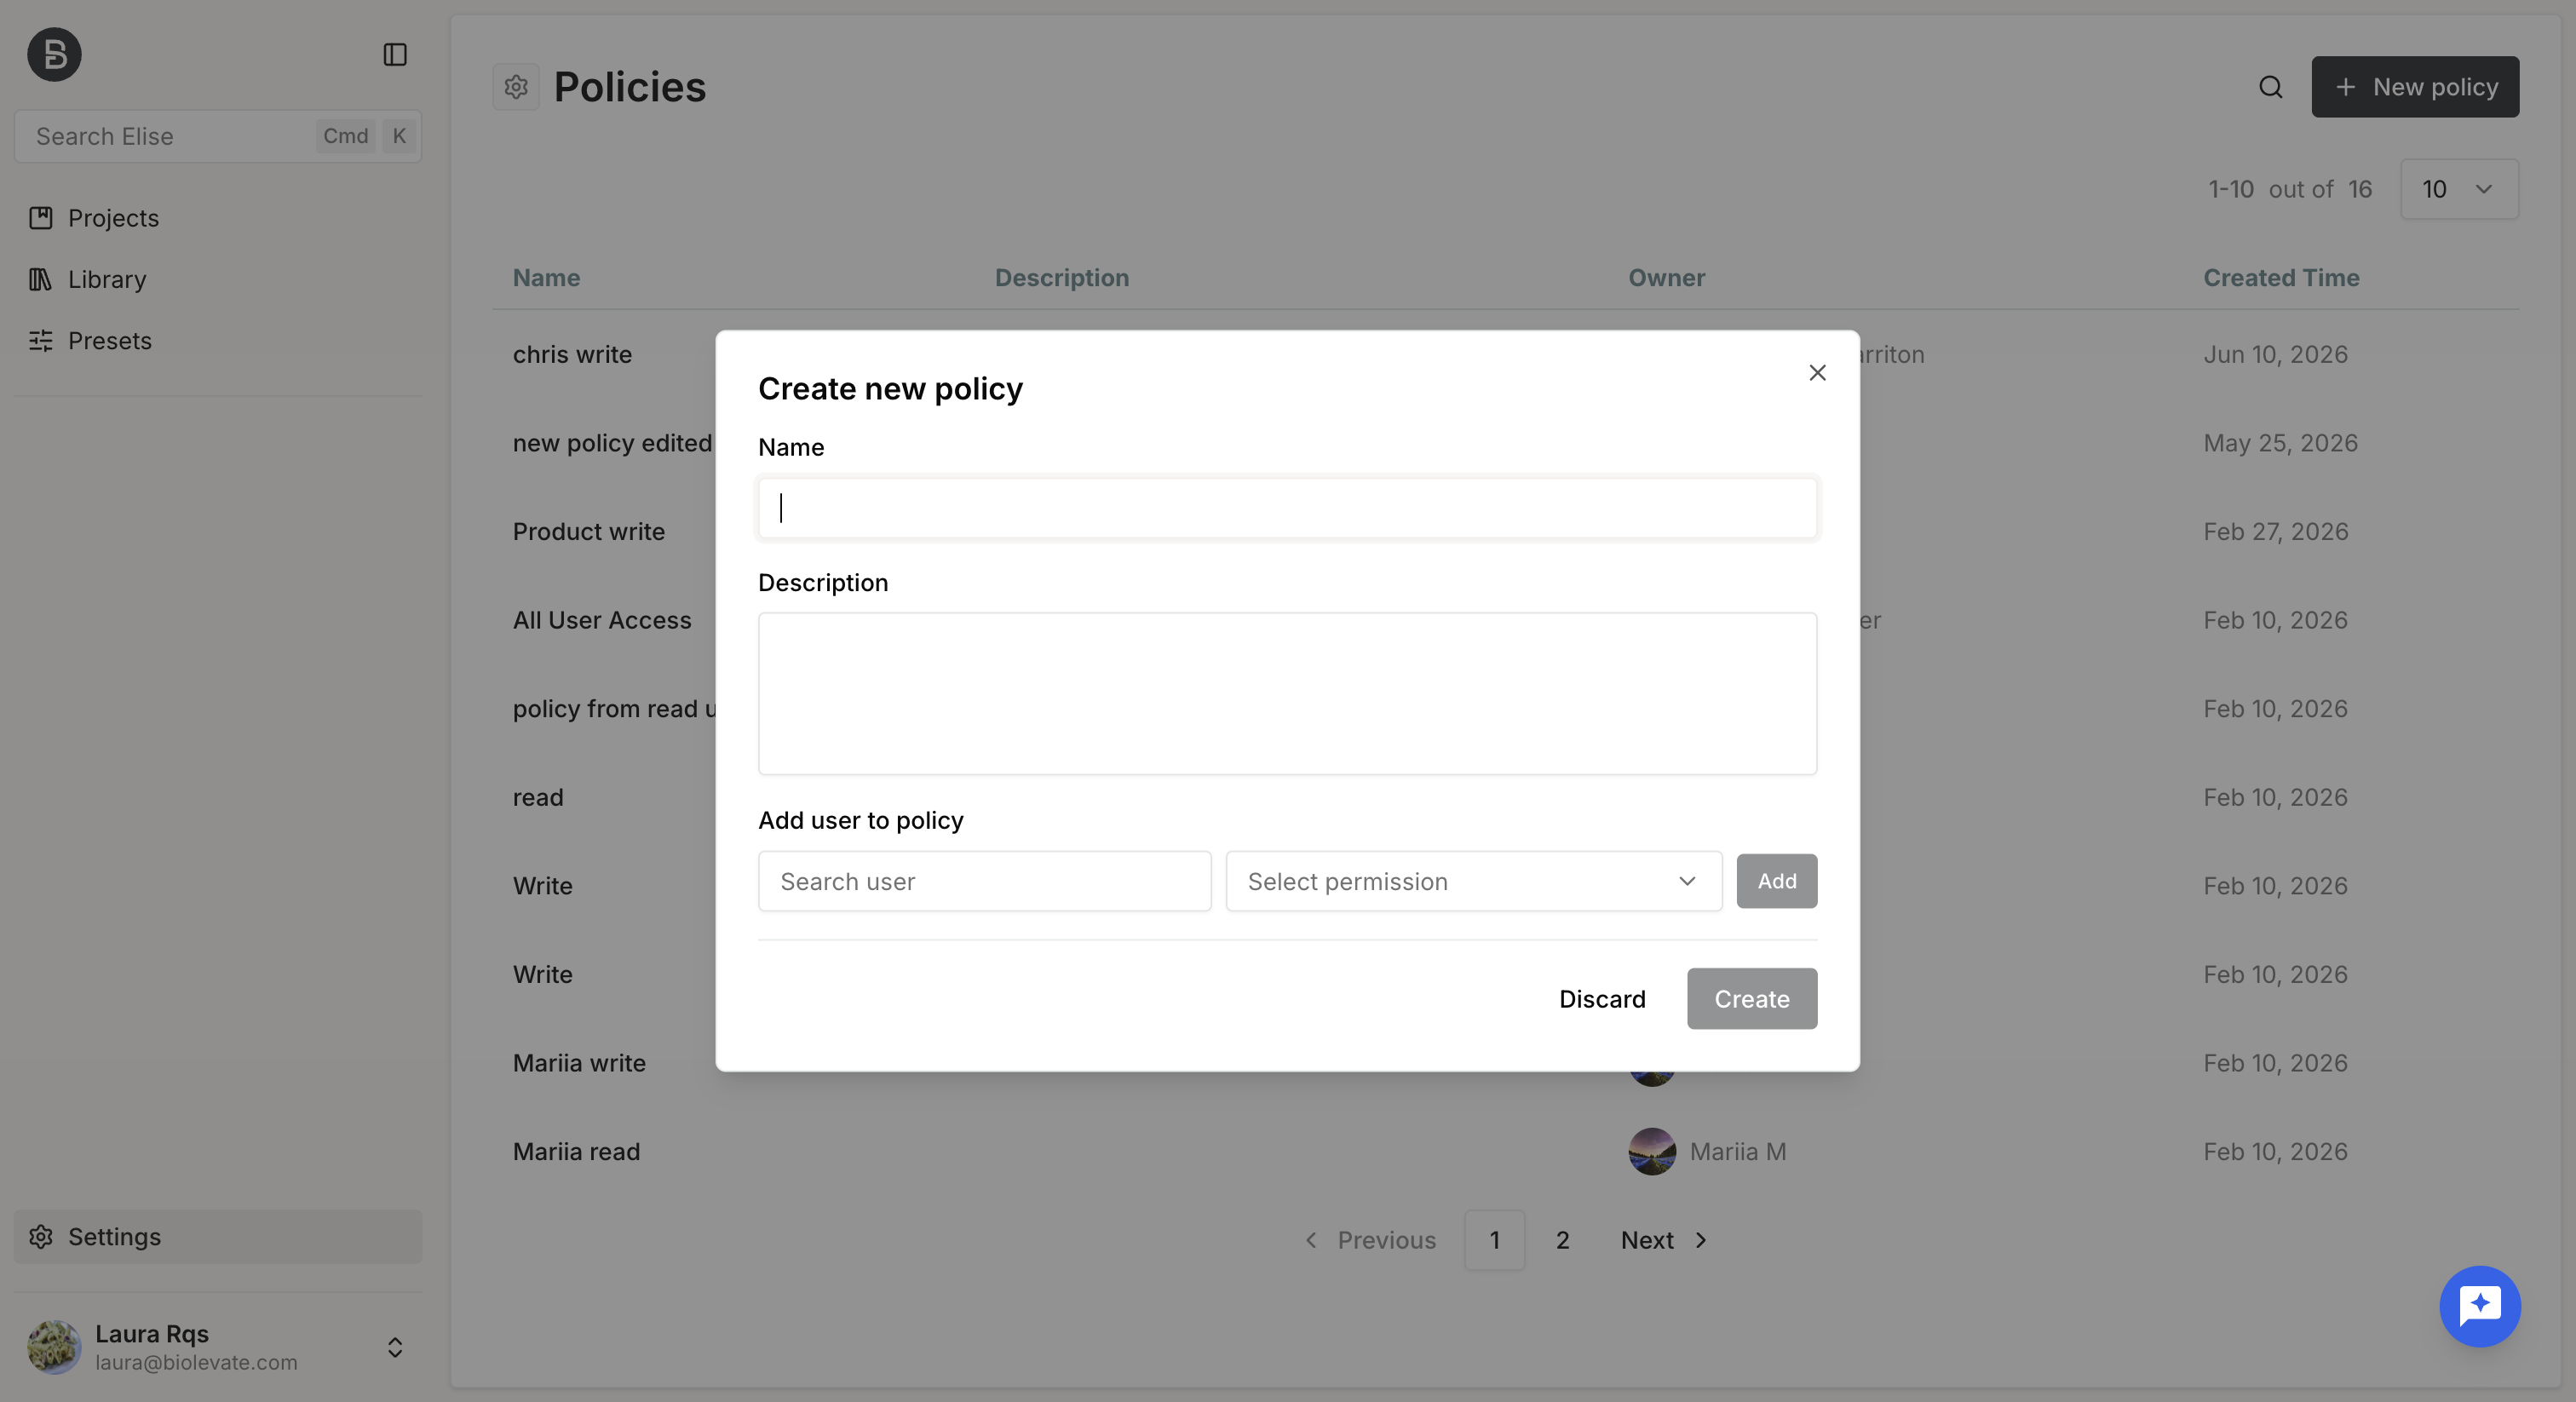
When creating a policy, you must:
- Enter a name.
- Optionally add a description.
- Assign at least one user and select a permission level.
There are two levels of permissions:
- Read: user can view the object but cannot modify it
- Write: user can view and edit the object
Creating a policy does not automatically grant access.
A policy only takes effect after it has been applied to one or more objects.
Apply a policy
To apply a policy to an object:
- Click on "Manage permissions"
- In the policy section, either:
- Select an existing policy, or
- Create a new one.
- Save your changes.
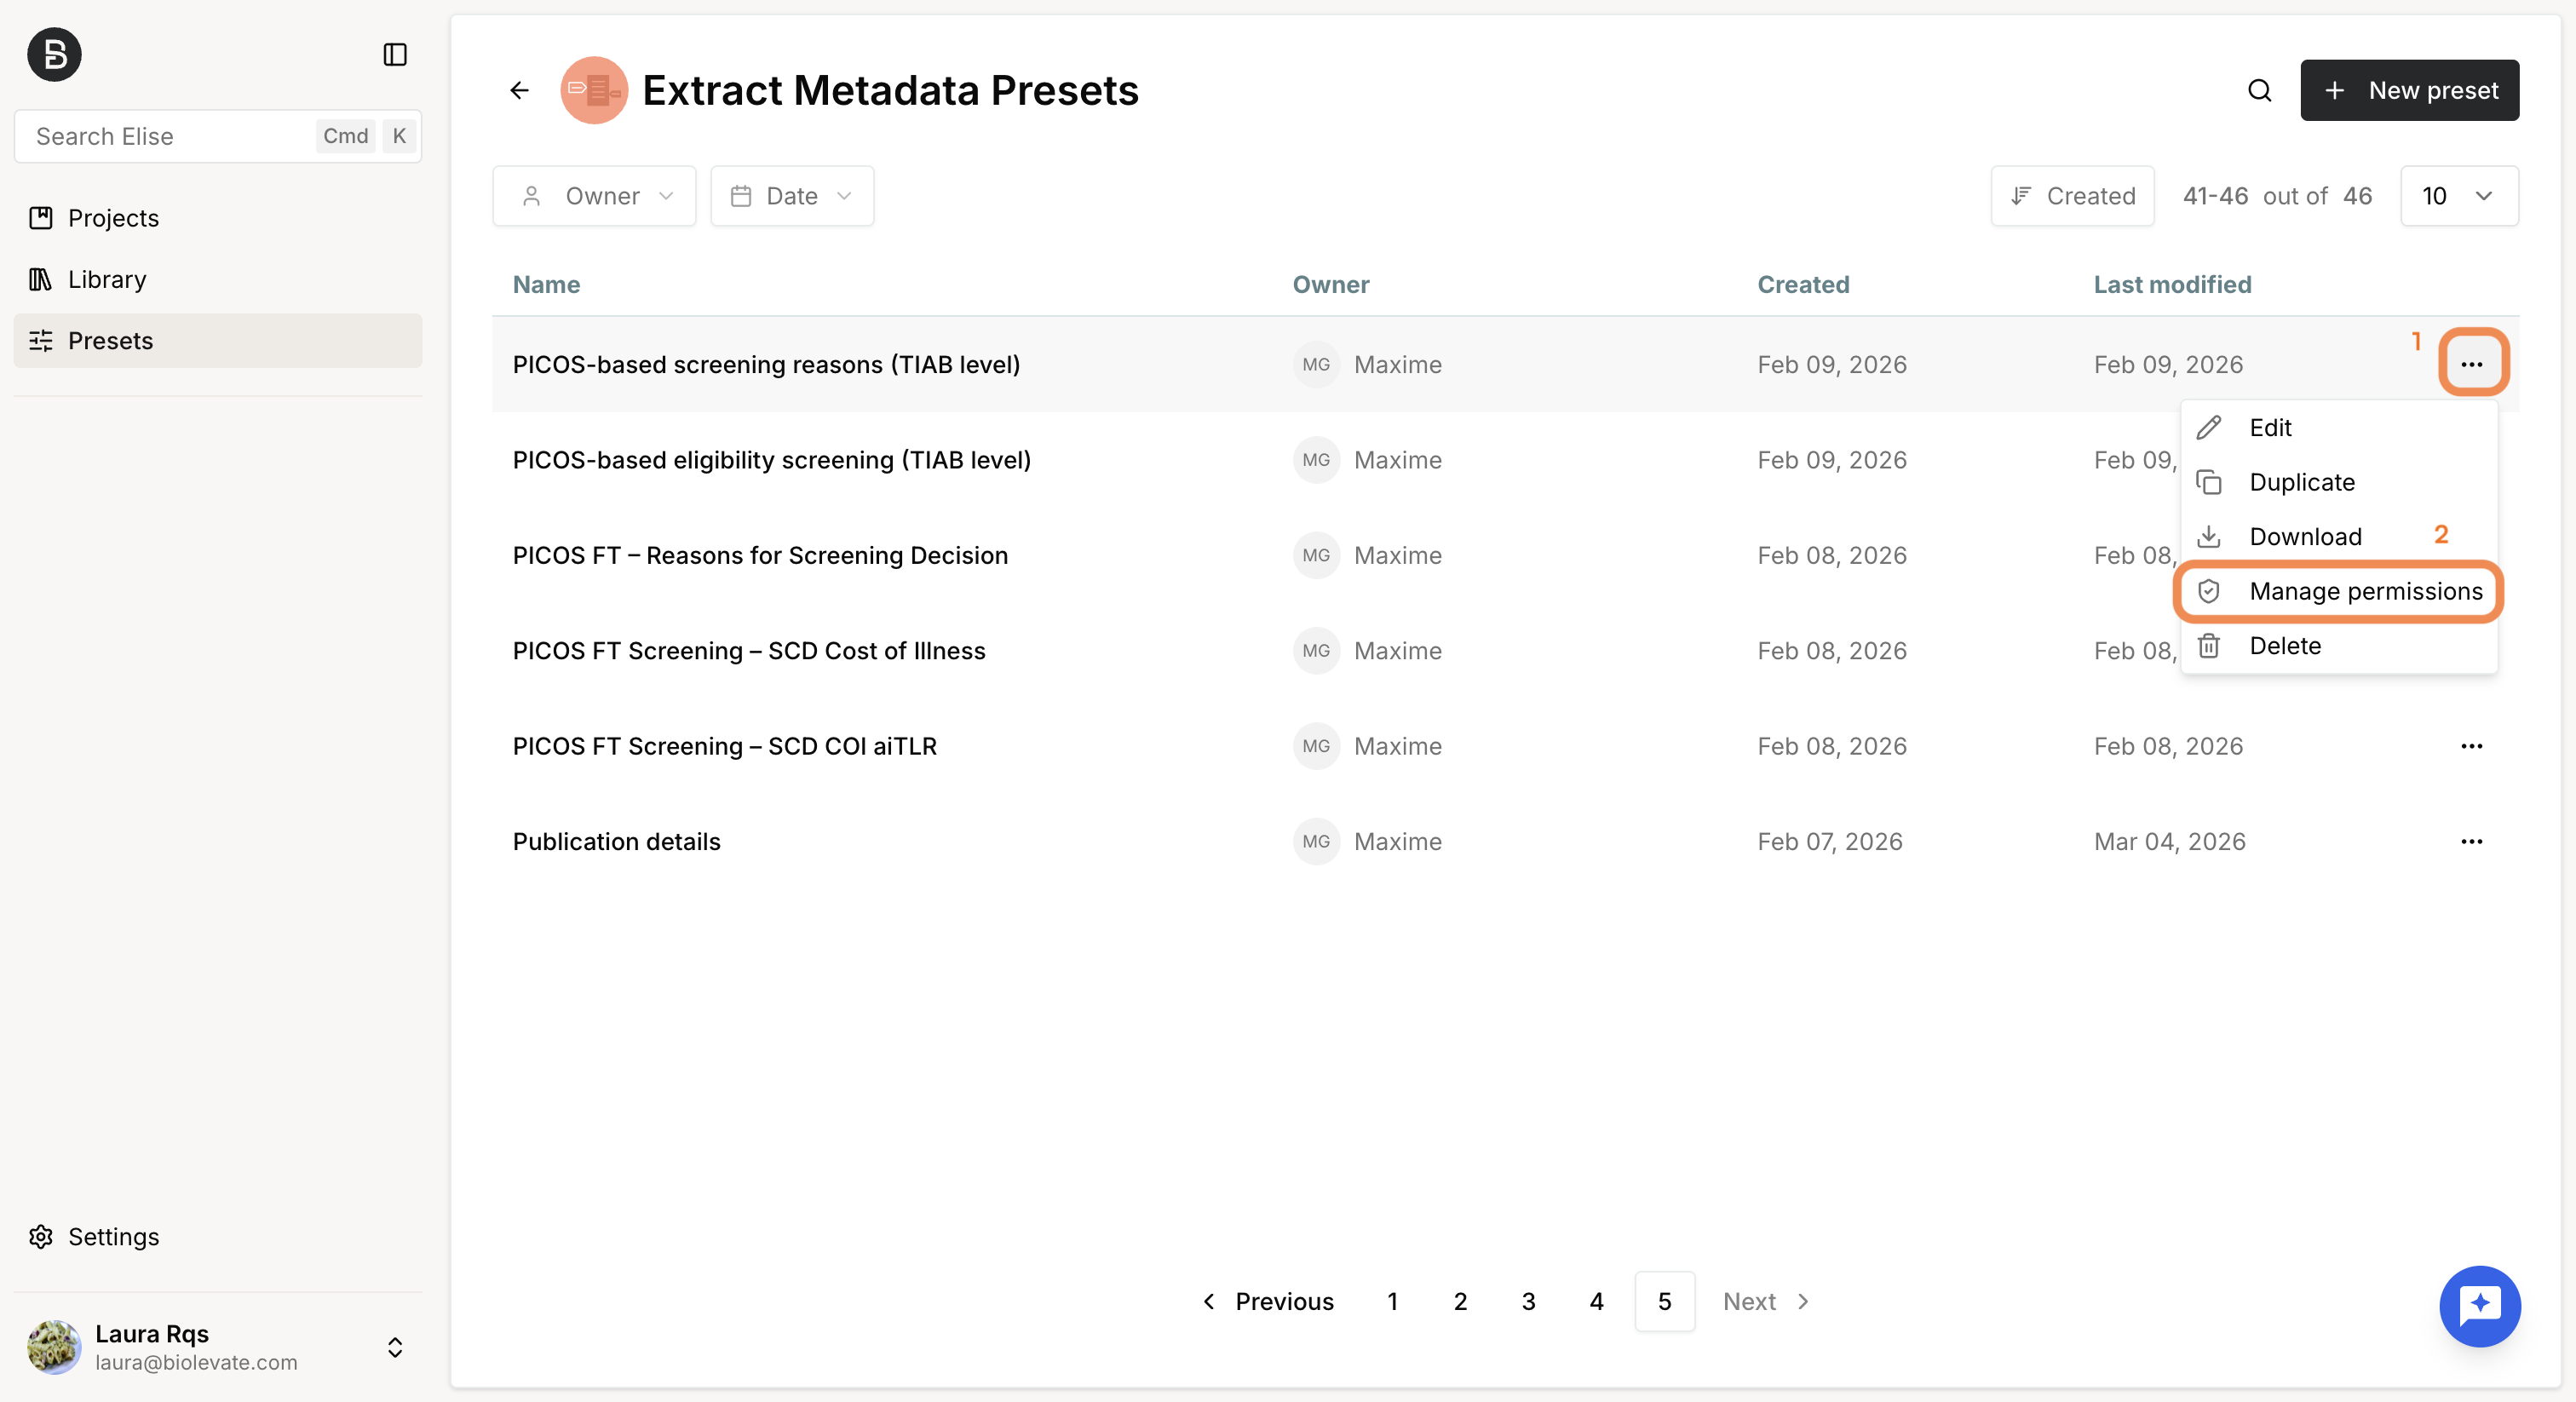
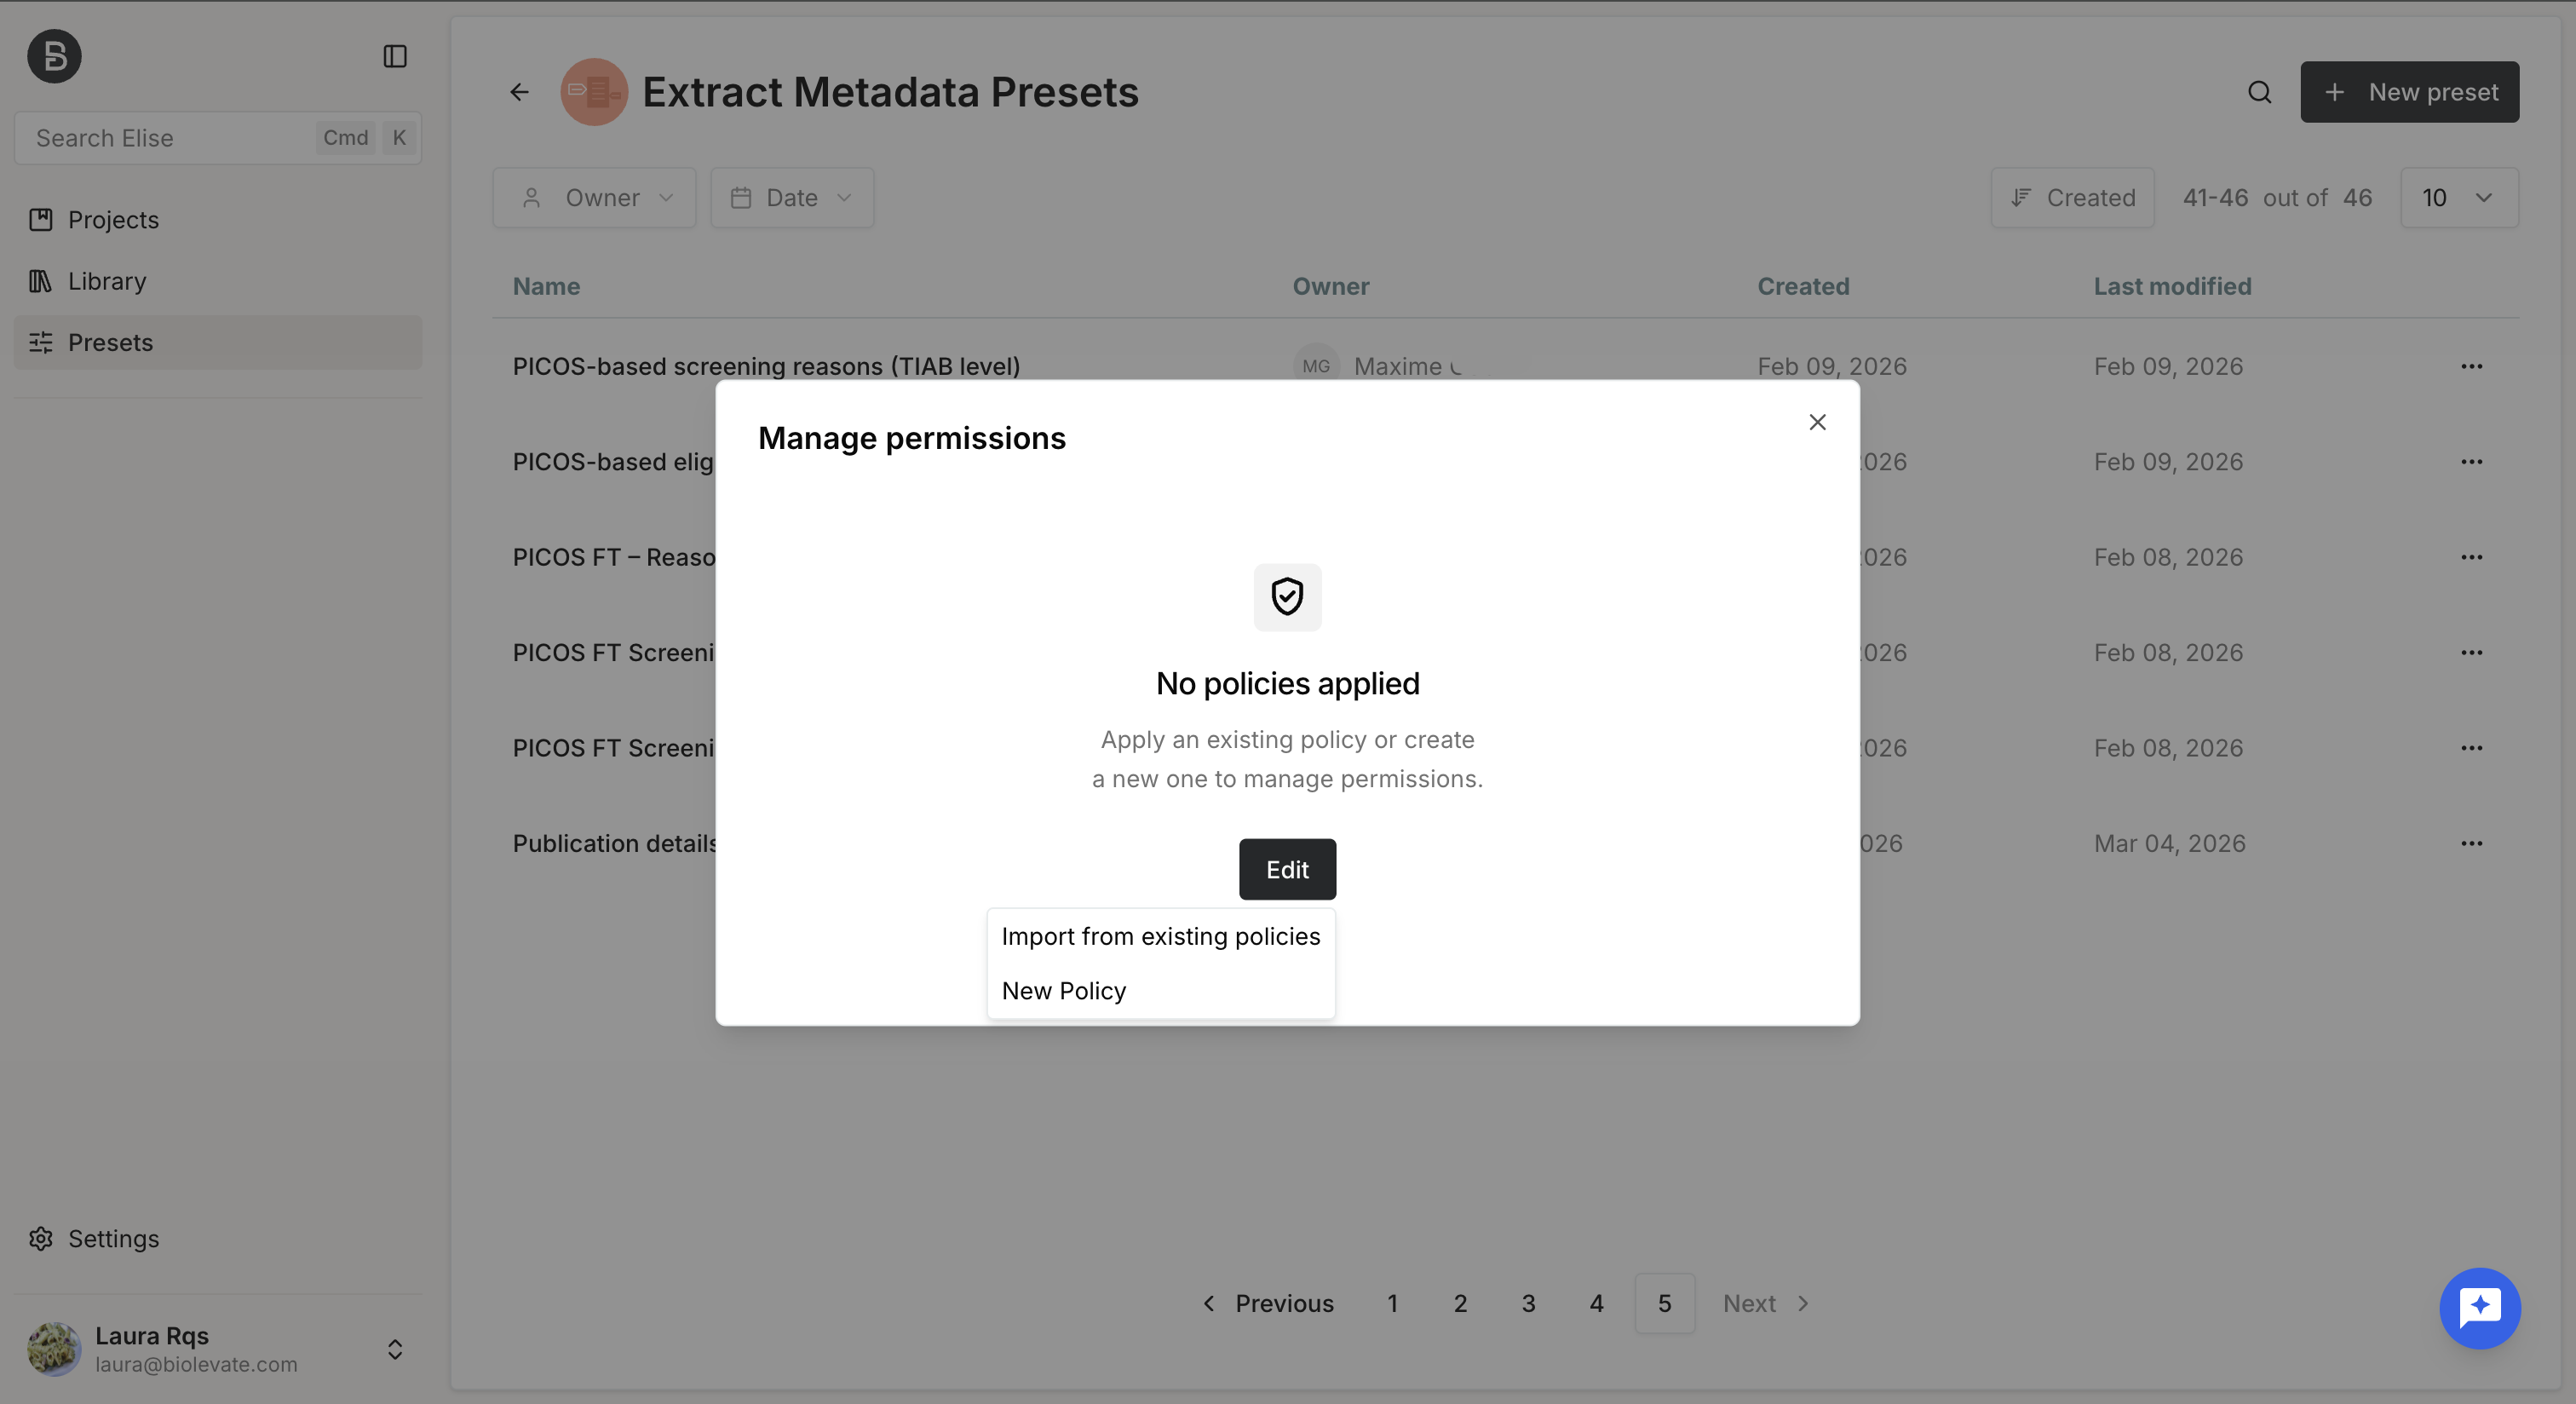
Once applied, all users included in the policy gain access to the object according to their assigned permission level.
If no policy is applied to an object:
- System administrators retain full access.
- Regular users cannot access or collaborate on the object.
| Action | Sys admin | User ‘write’ | User ‘read’ | User |
| Can edit owned object | YES | YES | YES | YES |
| Can edit owned object’s permissions | YES | YES | YES | YES |
| Can access not owned object | YES | YES | YES | NO |
| Can edit not owned object | YES | YES | NO | NO |
| Can edit not owned object’s permissions | YES | NO | NO | NO |
| Can delete not owned object | YES | NO | NO | NO |
Was this article helpful?
That’s Great!
Thank you for your feedback
Sorry! We couldn't be helpful
Thank you for your feedback
Feedback sent
We appreciate your effort and will try to fix the article